Yoga blocks are a versatile tool that can enhance your yoga practice by providing support, stability, and helping you reach new depths in your postures. Whether you’re a beginner or an experienced practitioner, yoga blocks can help you achieve proper alignment, improve your balance, and deepen your stretches. In this blog post, we’ll explore 30 different ways to use yoga blocks to support your yoga practice and take your poses to the next level. From providing a foundation for restorative poses to assisting in challenging arm balances, yoga blocks are a must-have accessory for any yoga enthusiast. Get ready to expand your yoga knowledge and find new ways to incorporate these handy props into your practice.
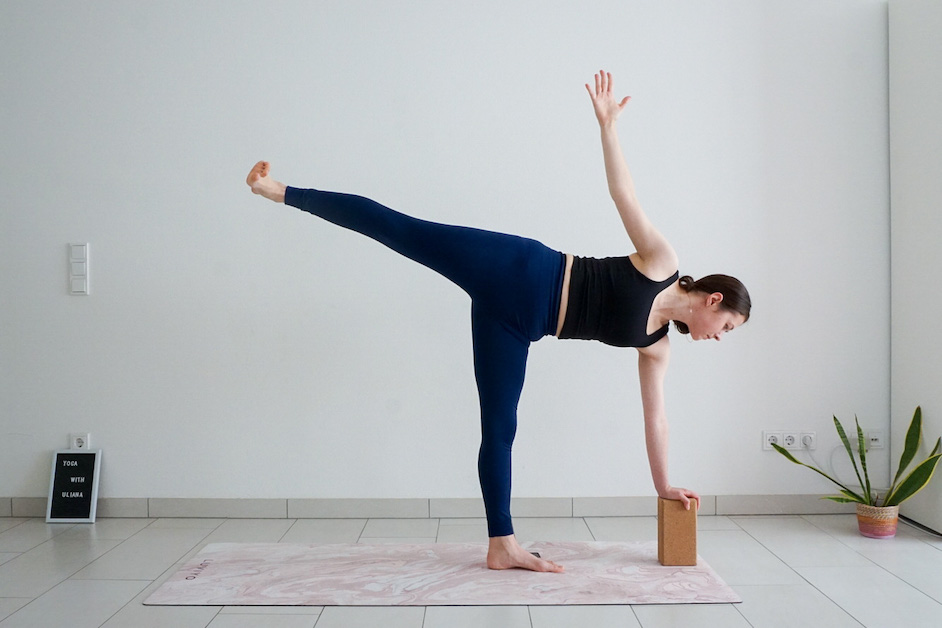
1. Warrior III

In Warrior III Pose, a yoga blocks can be used to help improve balance and stability. To use the blocks, place them on highest setting in front of you on the ground, ground the hands on the blocks and lift one leg behind you parallel to the ground.
2. Standing Split
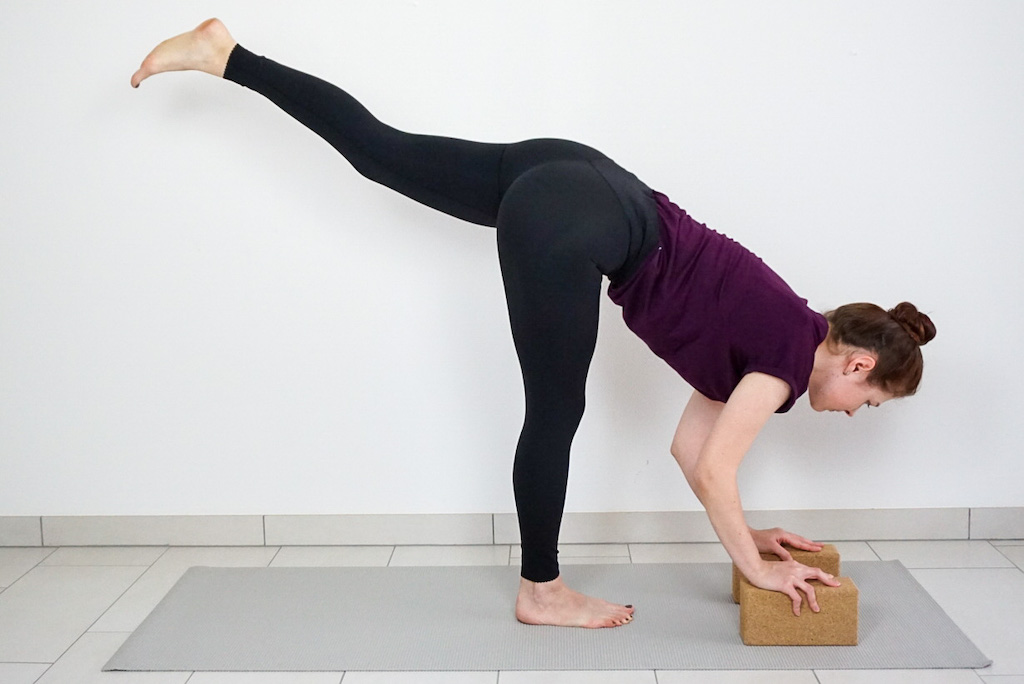
For Standing Split, place your blocks on lower setting than for Warrior III and try to lift the back leg even higher.
3. Half Moon Pose
Place the block on its highest setting near the outside edge of your front foot. Hold onto the block with one hand while reaching the other arm towards the sky and lifting the back leg. The block will provide support and allow you to focus on maintaining balance and proper alignment.
4. Extended Side Angle
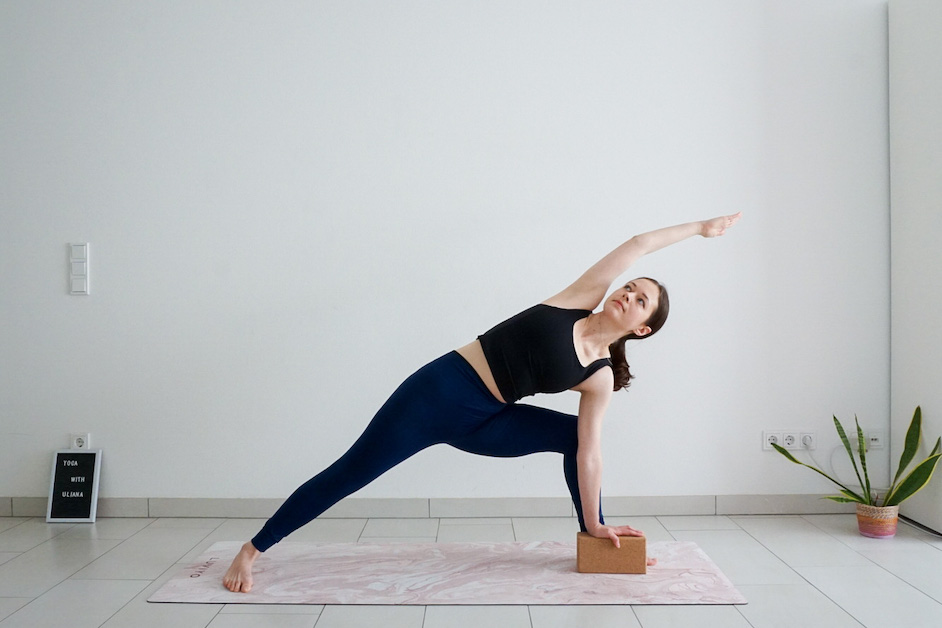
To make this pose more accessible, place your hand on a yoga block either inside or outside the front foot. You can start with the highest setting of the block and gradually lower it as you become more flexible, until you are eventually able to place your hand on the mat.
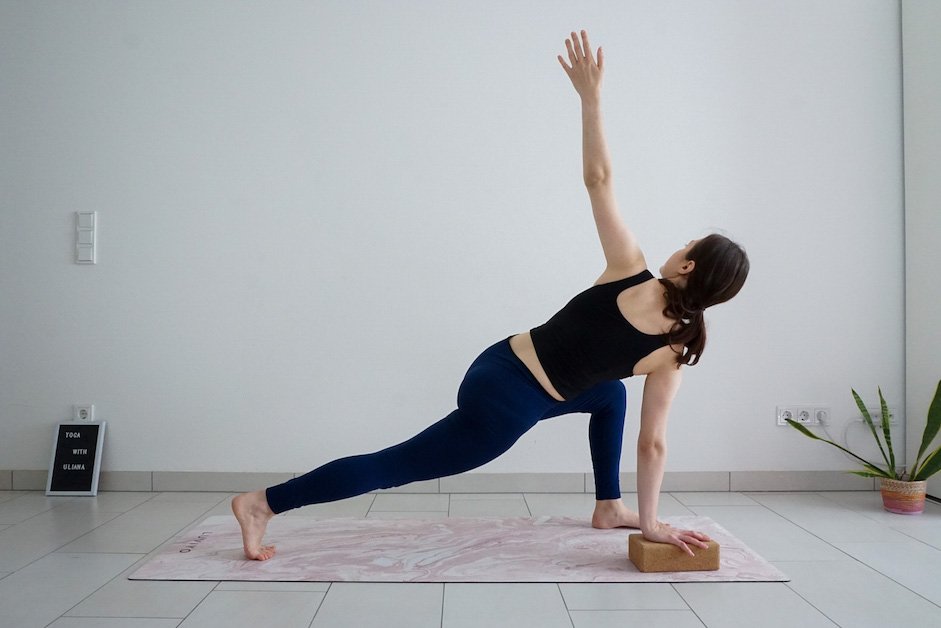
5. Revolved Side Angle
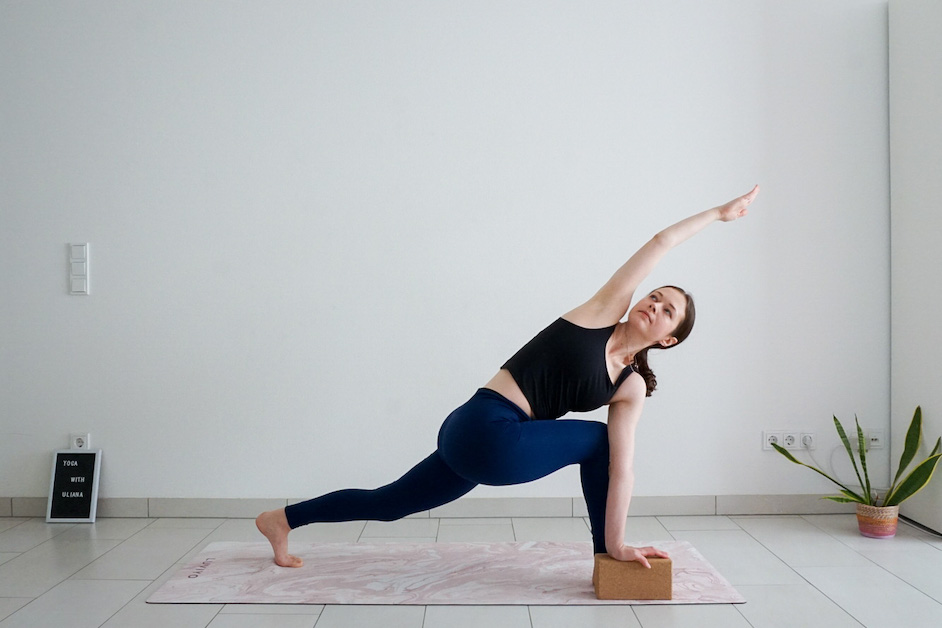
The same concept applies to the Revolved Side Angle pose. By using a yoga block outside your front foot, you can create a shortcut to the floor.
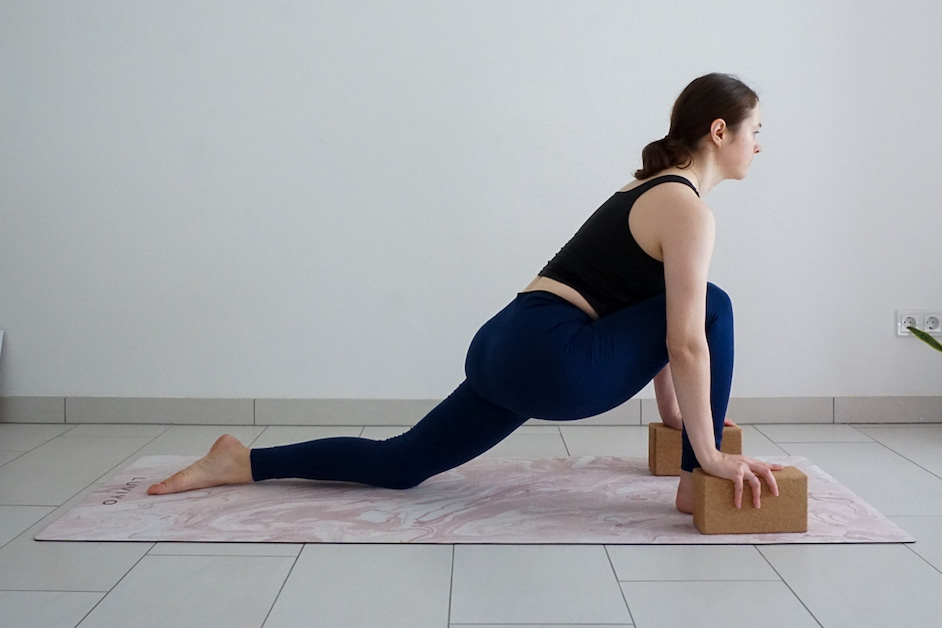
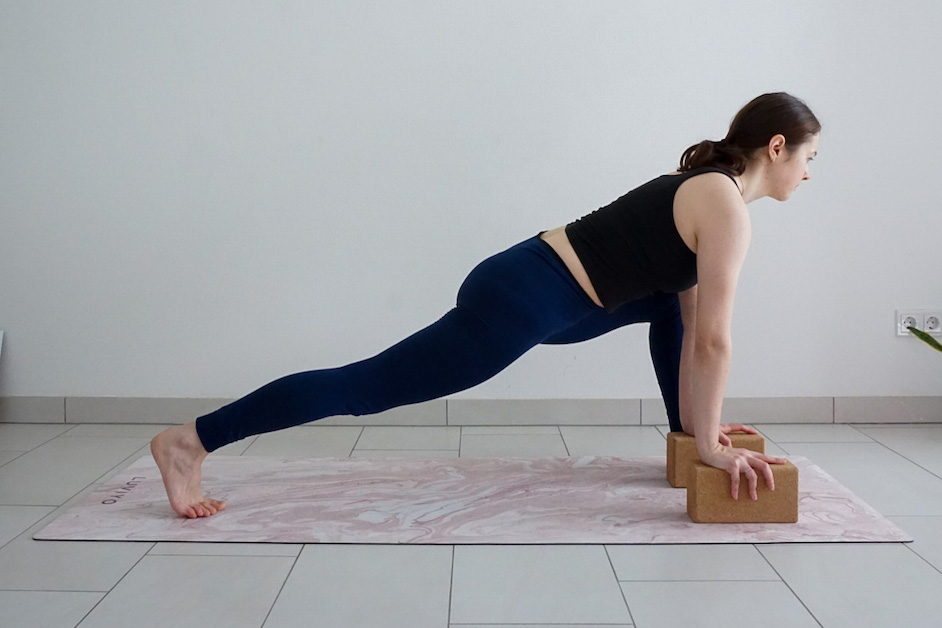
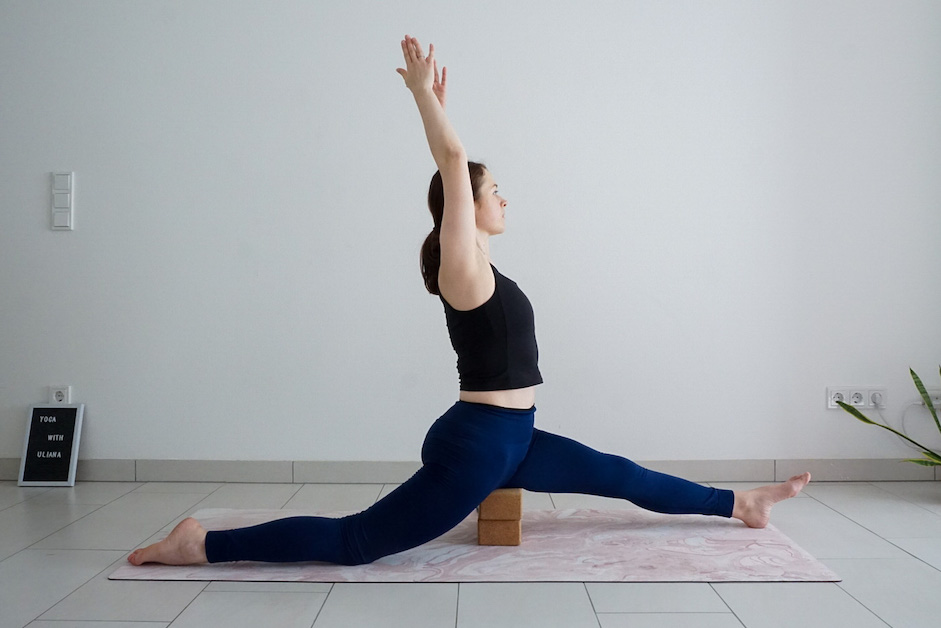
6. Low Lunge
Using yoga blocks can help you maintain the proper form in different low lunge variations if your hands are not able to reach the floor comfortably. Low lunge is are great pose for increasing hip flexibility, so utilizing the blocks will allow you to focus on the pose without having to worry about upper body strain.
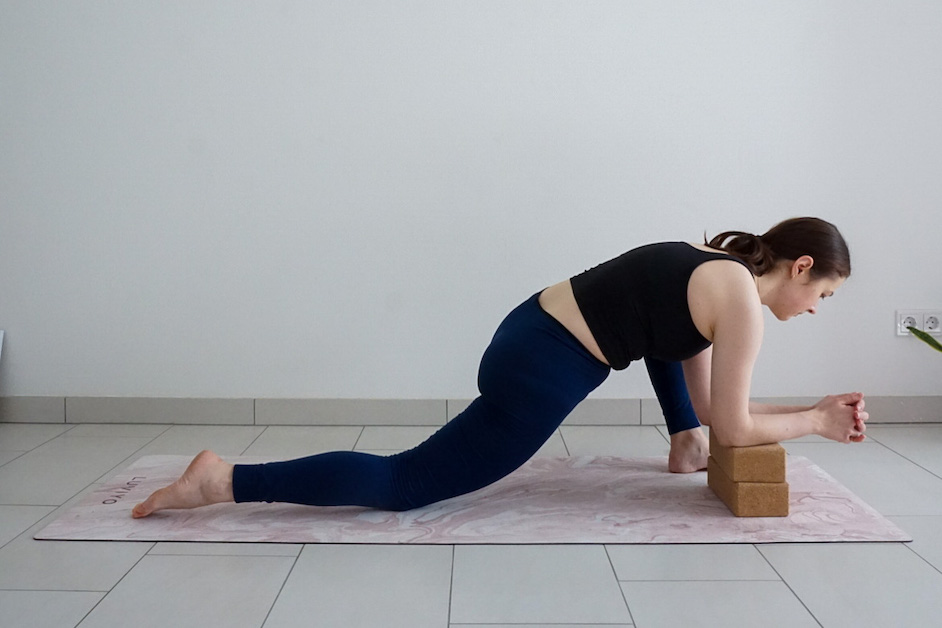
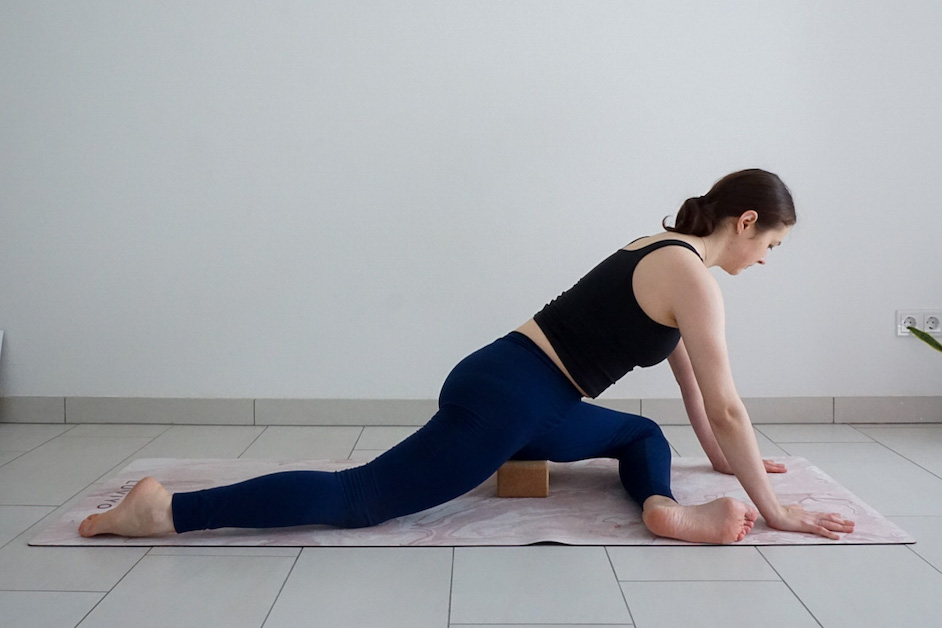
7. Lizard Pose
Similar to Low Lunge, you can use blocks as a shortcut to the floor. Place a block or two on the inner side of your front foot and keep your hands or forearms on the blocks.
8. Standing Forward Bend
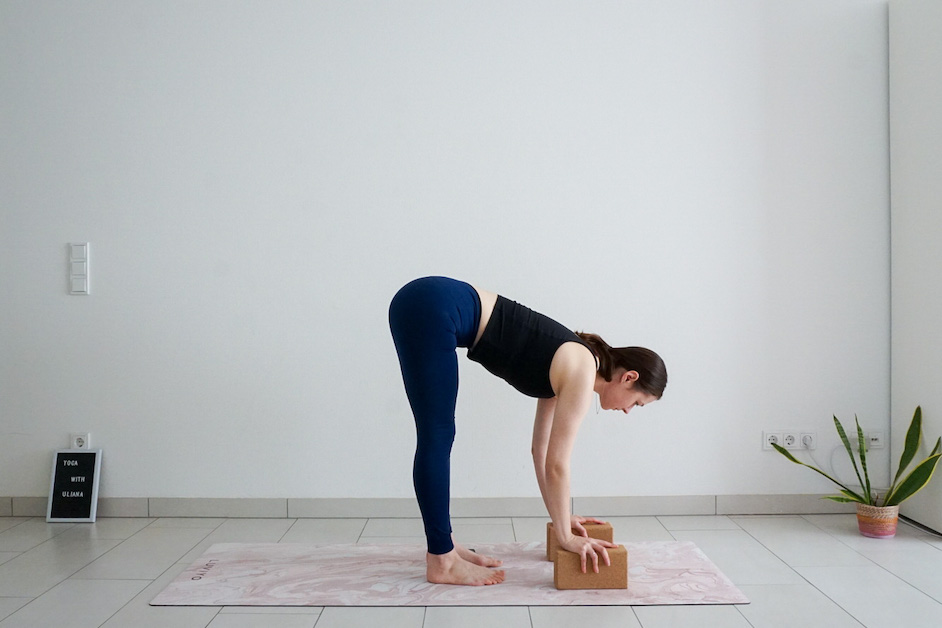
It can be easy to round your back while attempting to reach your toes in this pose, but using two blocks under your hands can provide extra support and help you keep your spine elongated as you bend forward from the hips.
9. Wide-Legged Standing Forward Bend
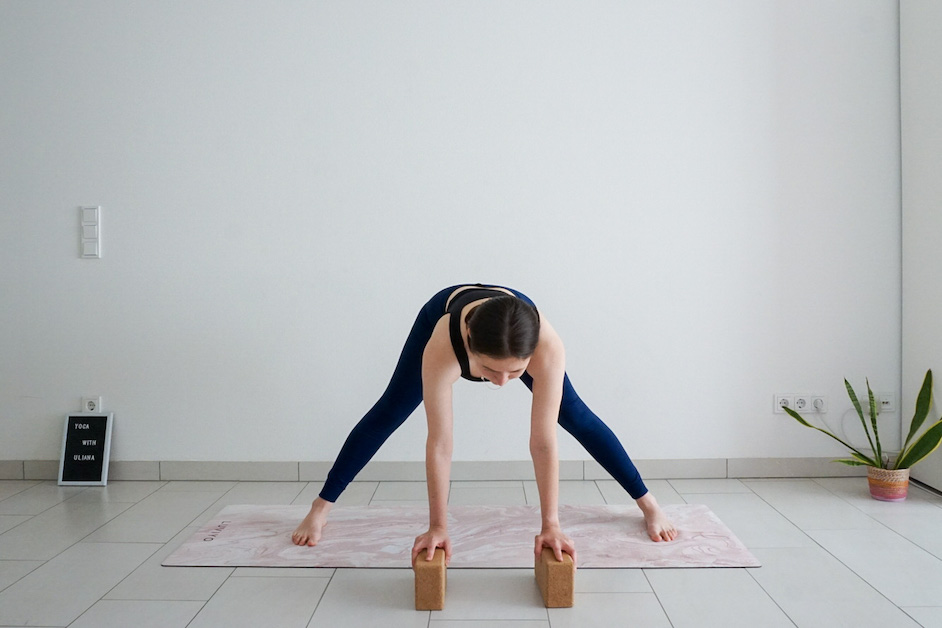
Similarly, using two blocks under your hands in the Wide-Legged Standing Forward Bend will allow you to maintain proper form and keep your spine elongated as you bend forward.
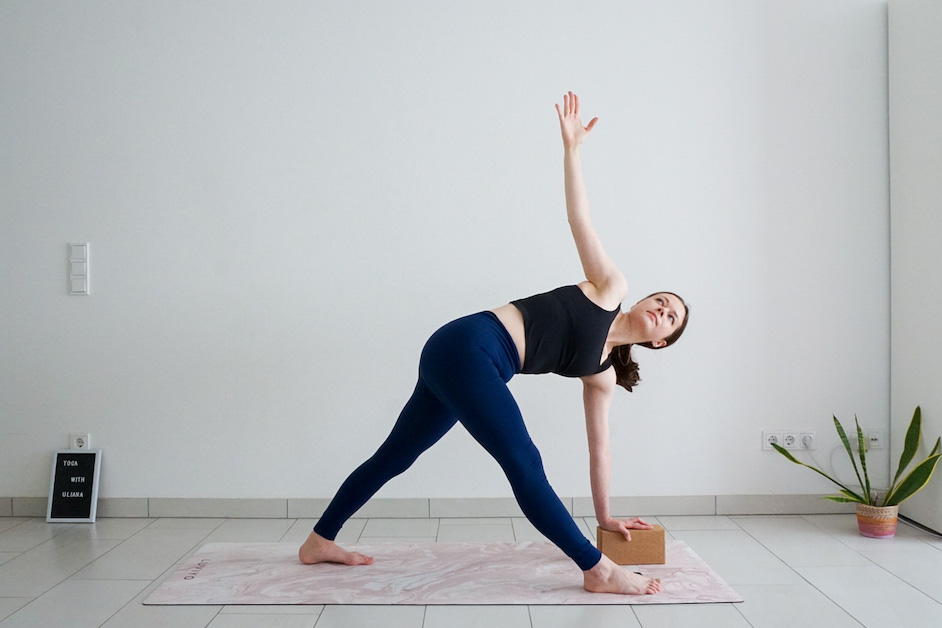
10. Triangle Pose
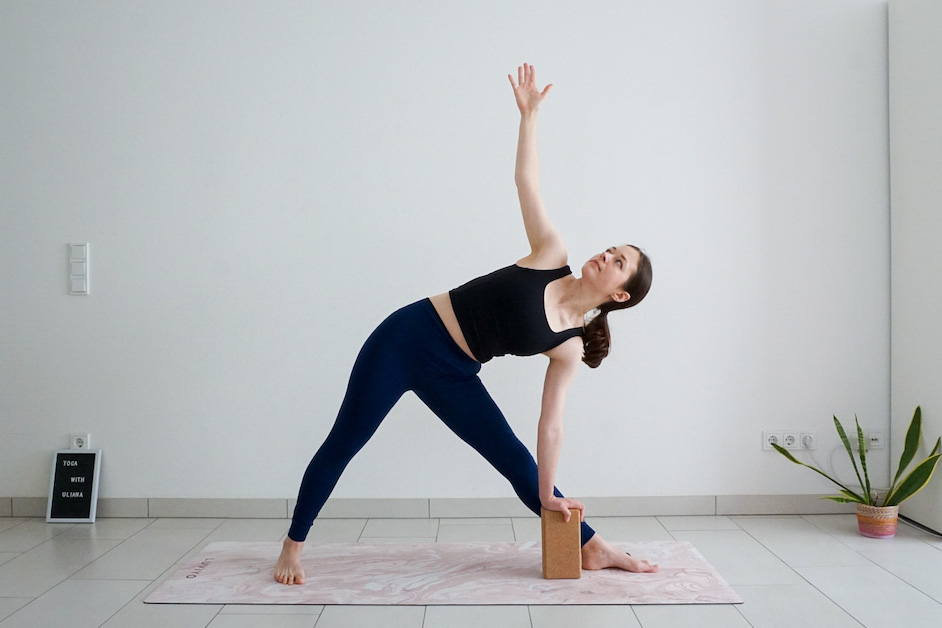
To provide additional stability in Triangle pose, try using a block either inside or outside the foot instead of placing your hand on your ankle or shin. This will allow you to focus on lifting your chest and reaching through your fingertips. Experiment with different heights and positions of the block to find what works best for you.
11. Revolved Triangle Pose
In this variation of Triangle Pose, you can place your hand on a block located on the outside or inside edge of your front foot for extra support as you twist away from the front leg.
12. Pyramid Pose
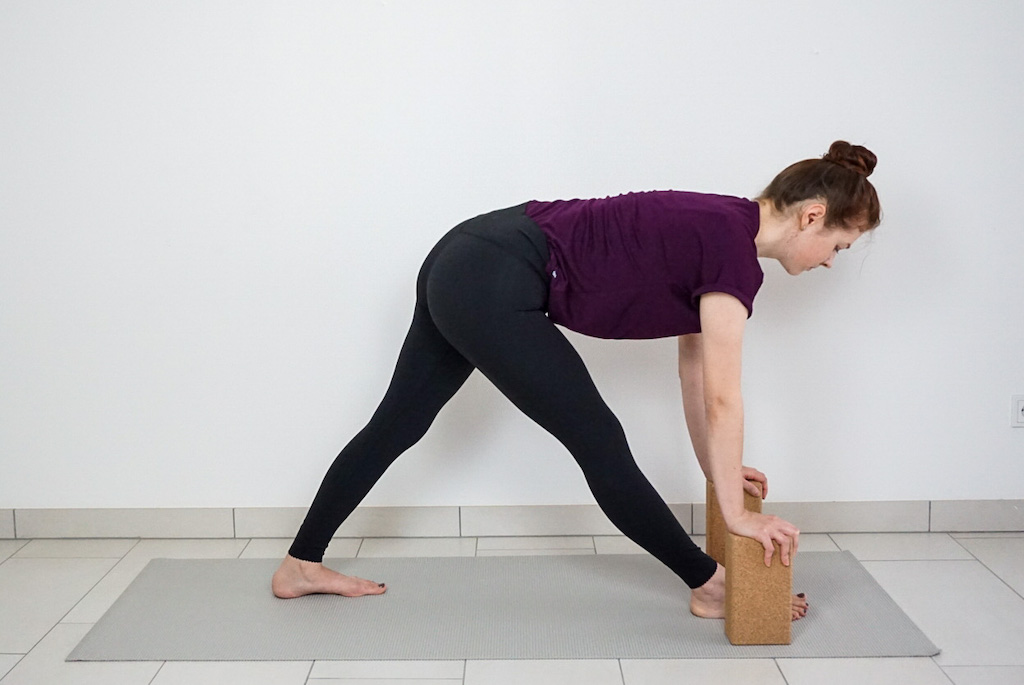
When practicing Pyramid Pose, using yoga blocks can help maintain length in the upper body as you bend over the front leg. The blocks provide a stable base for the hands, allowing you to focus on proper alignment and technique.
13. Garland Pose/Yoga Squat
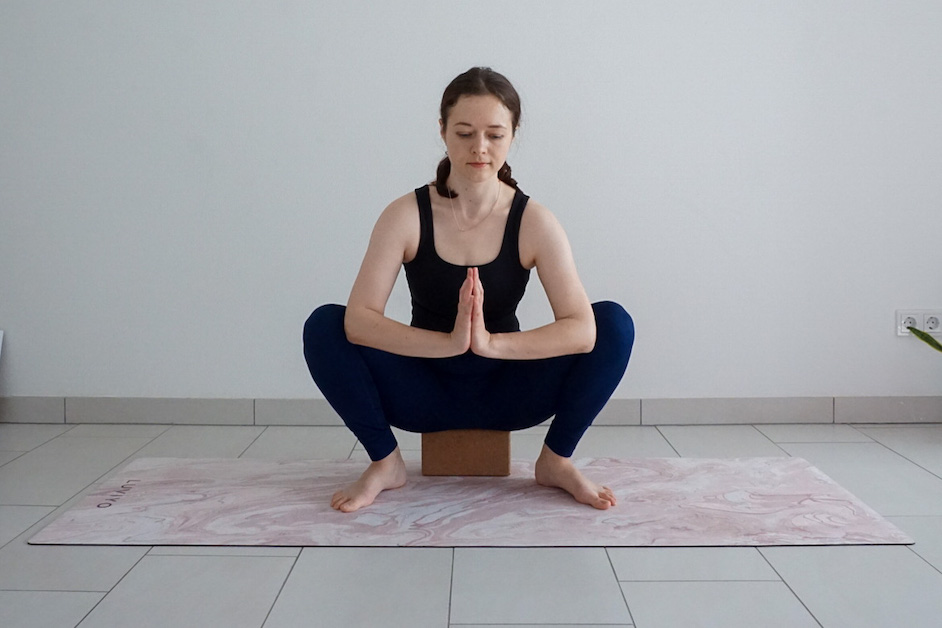
Tight hips might prevent you from sitting deep into this pose. Try sitting on a block or two for added support.
14. Camel Pose
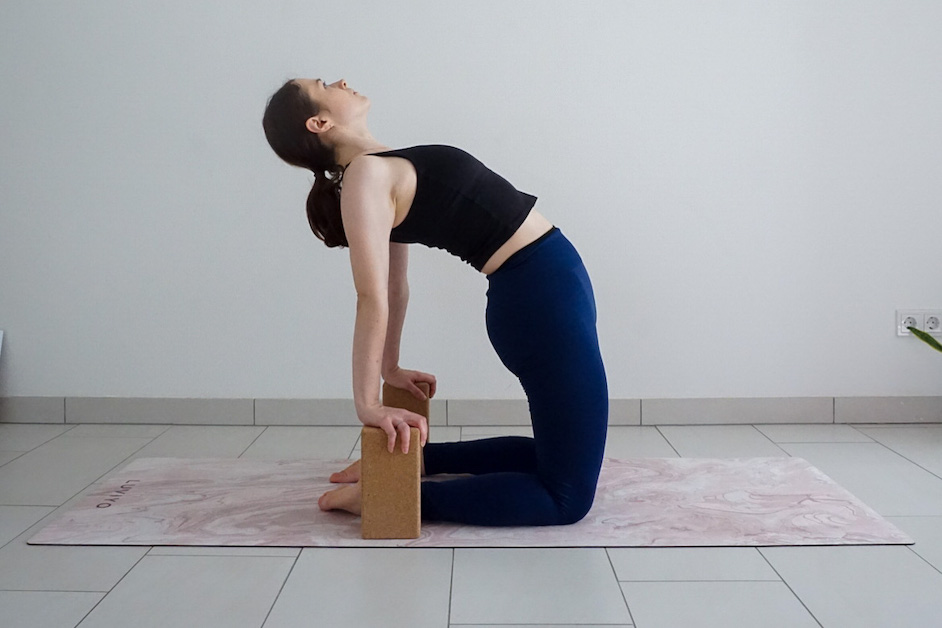
Place two blocks on the outsides of your shins or ankles for this modification of Camel pose. Try it with the highest setting first and lower the blocks as you progress.
15. Downward Facing Dog
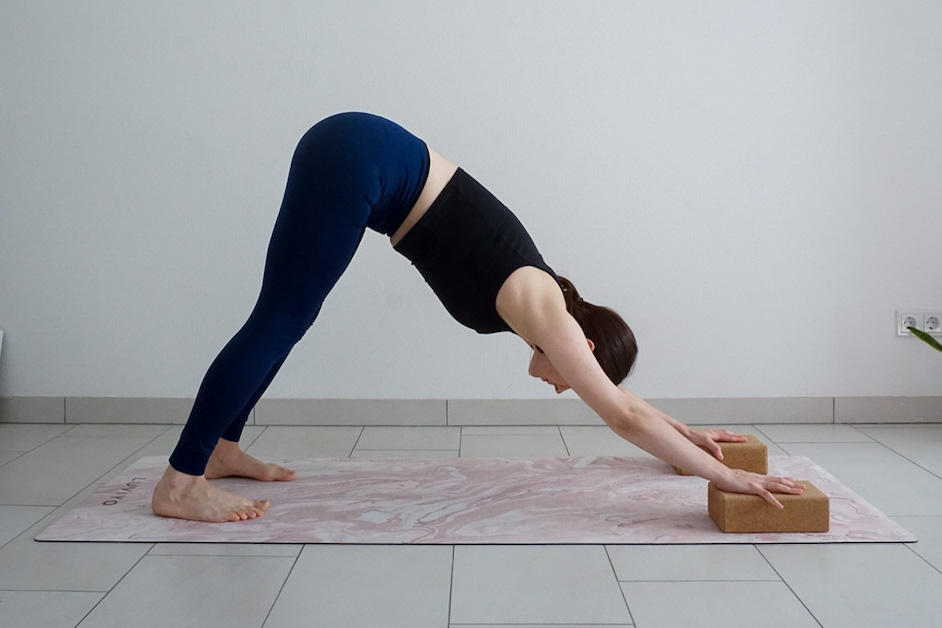
Place two yoga blocks shoulder-width apart. The added height of yoga blocks elevates the pressure off your wrists and makes it easier to lengthen the spine in Downward Facing Dog.
16. Upward Facing Dog
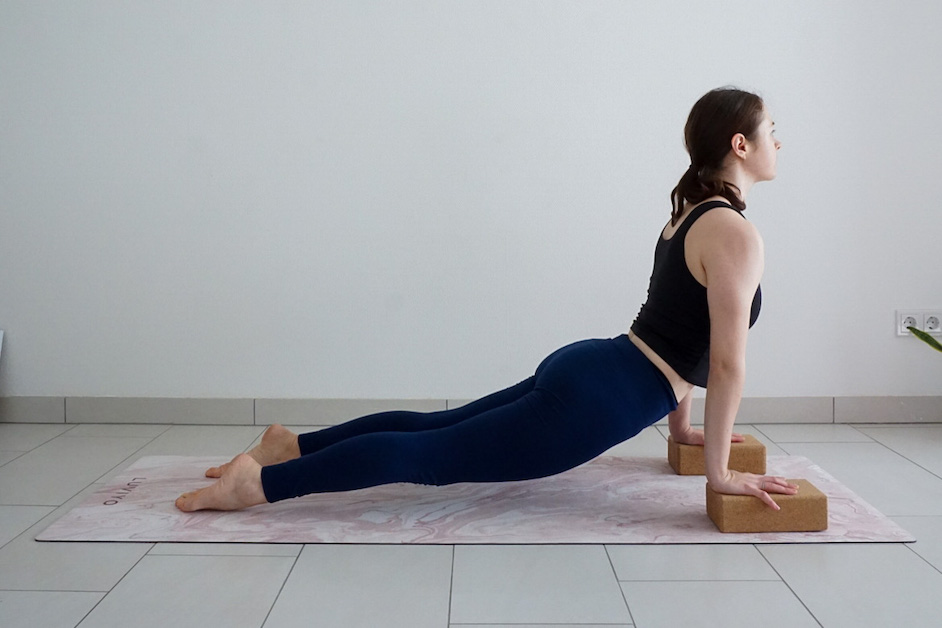
Try using yoga blocks under your hands when you practice this pose. The added height gives you more space to stretch the upper body.
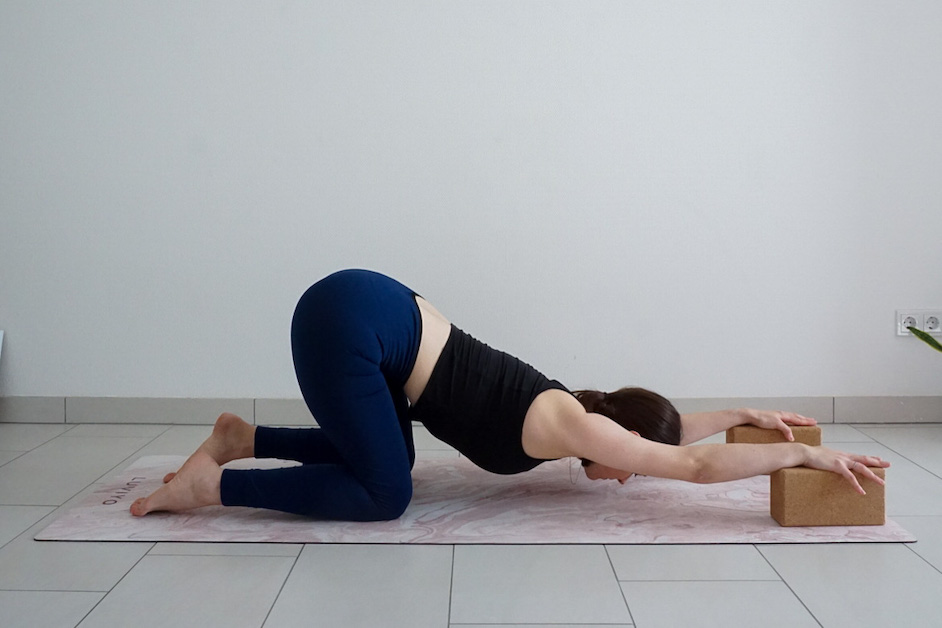
17. Puppy Pose
This Puppy pose variation with blocks under hands or elbows gives you a deeper stretch in chest and shoulders.
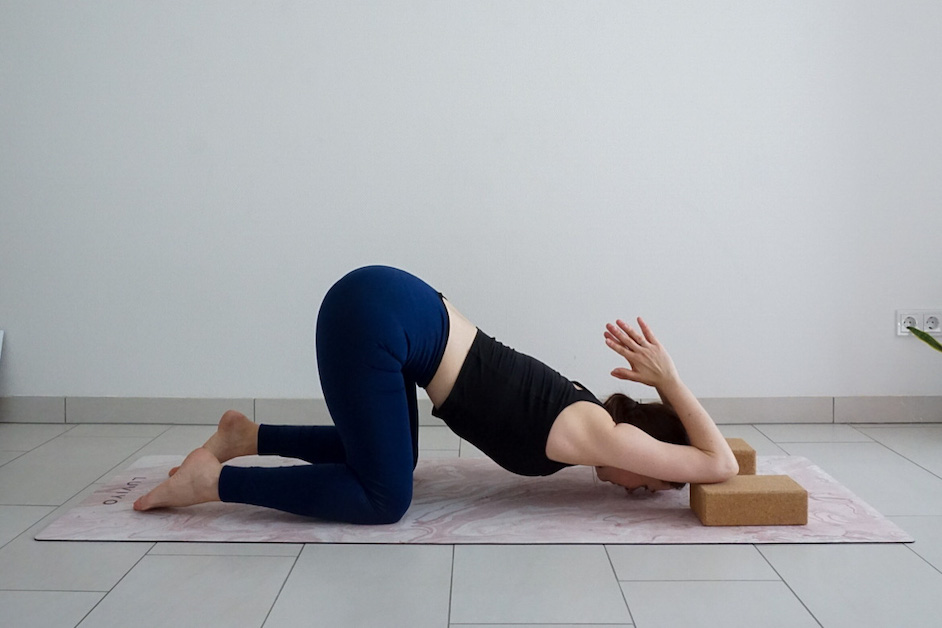
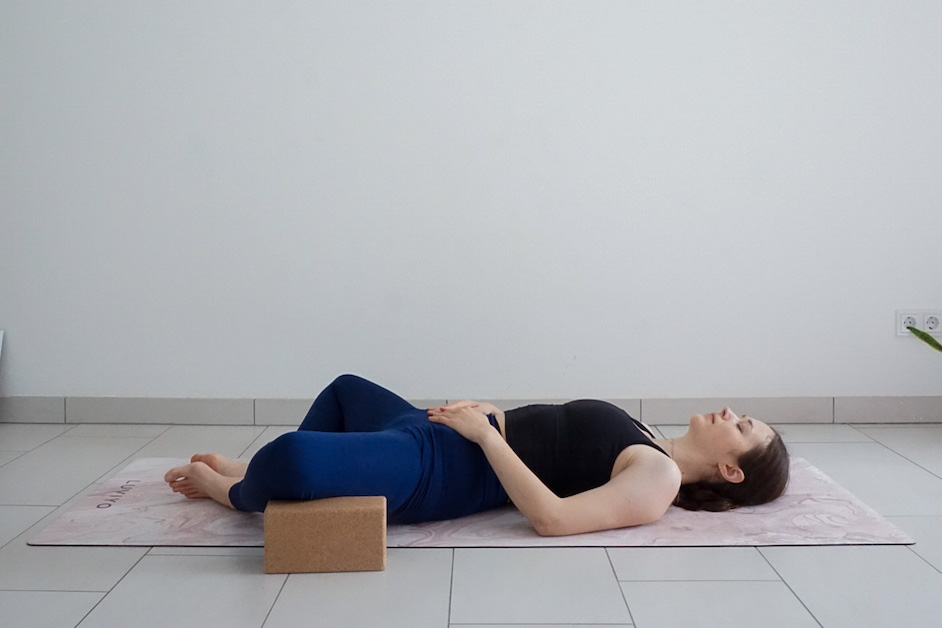
18. Child’s Pose
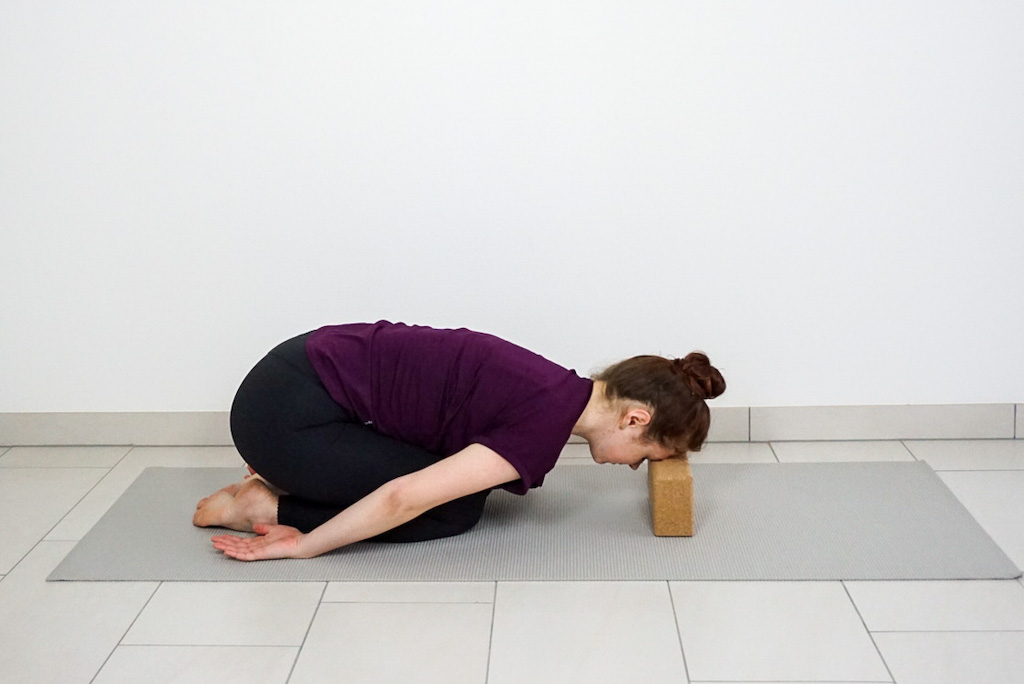
Place a block under your forehead for extra support if the forehead doesn’t reach the mat. Foam block might feel better than the cork block in this case.
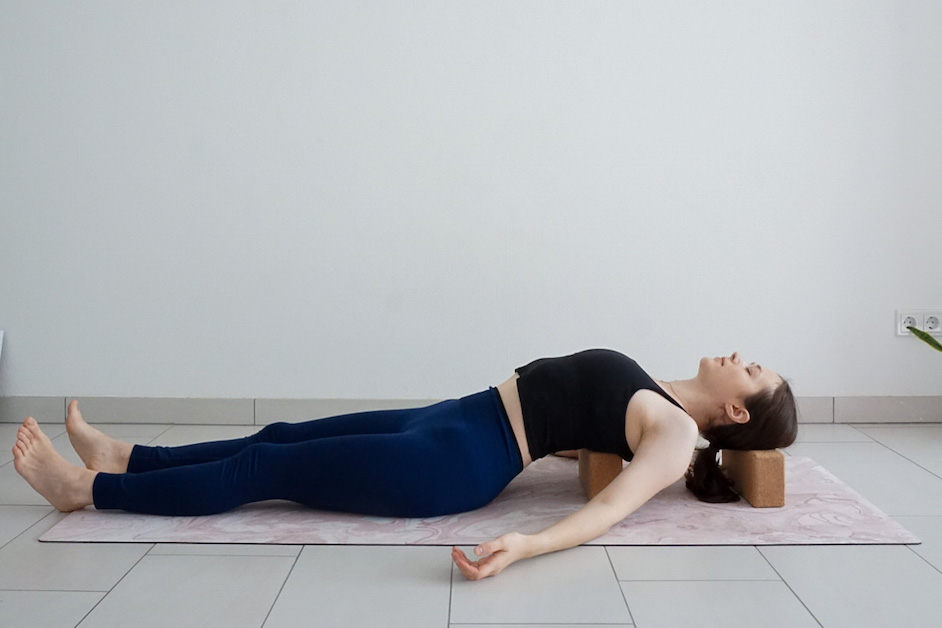
19. Supported Bridge Pose
Place a block under your sacrum on the lowest setting first and then see which height feels better. You can keep your legs bent or extended on the floor.

20. Pigeon Pose
Place a block under your hip if it is lifted too far off the ground and prevents you from relaxing into this pose.
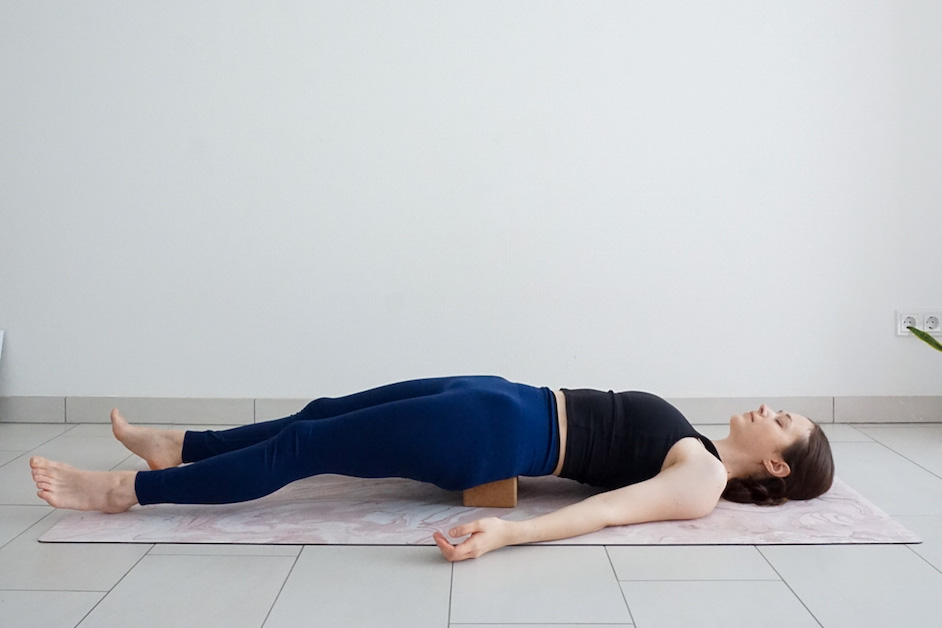
21. Supported Fish Pose
For this supported backbend, place a yoga block under use shoulders. Start with the lowest setting and change to the middle setting if you need a deeper stretch. If your neck feels comfortable, you can rest your head on the mat. Otherwise, use an additional block to support your head. Experiment with different block heights to find what feels best for you.
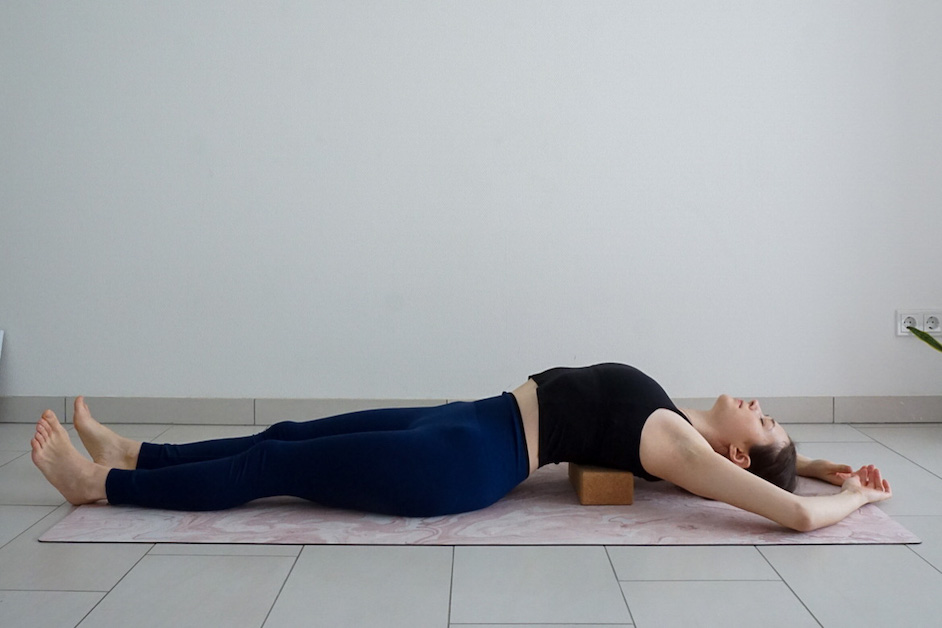
22. Reclined Bound Angle Pose
If you experience too much strain in your inner thighs and groin during this pose, support your legs with the blocks to allow for a deeper relaxation of the muscles.
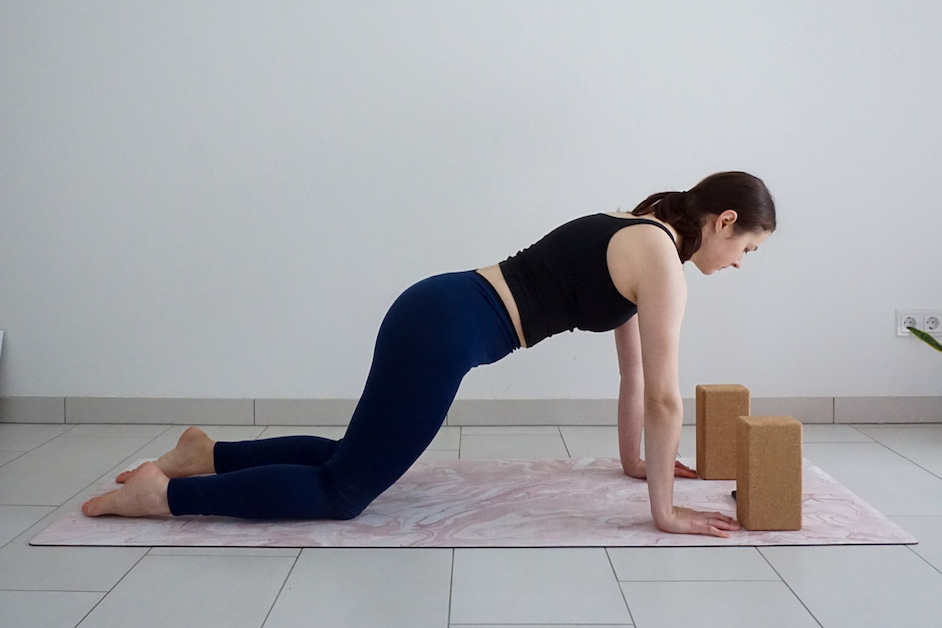
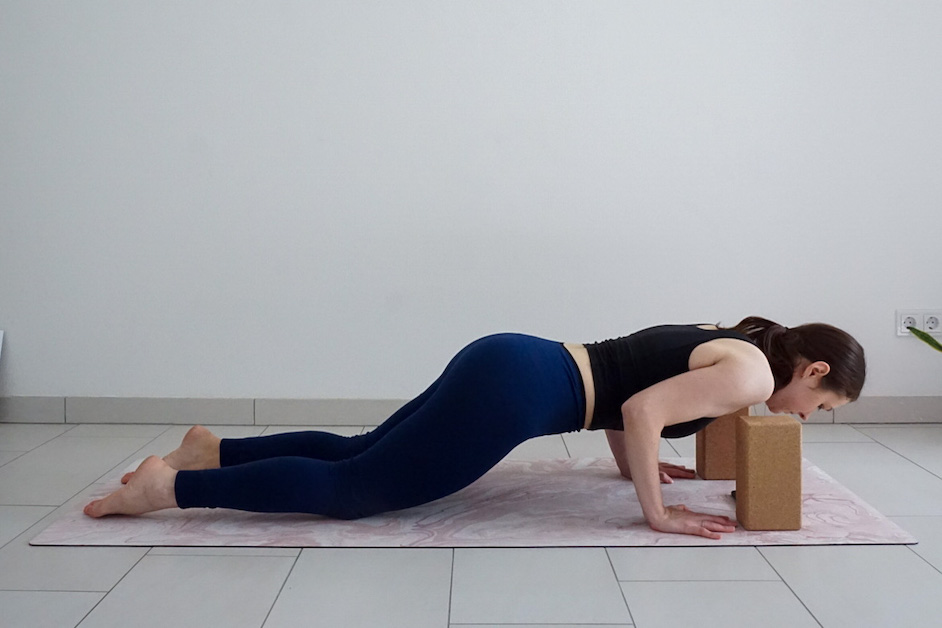
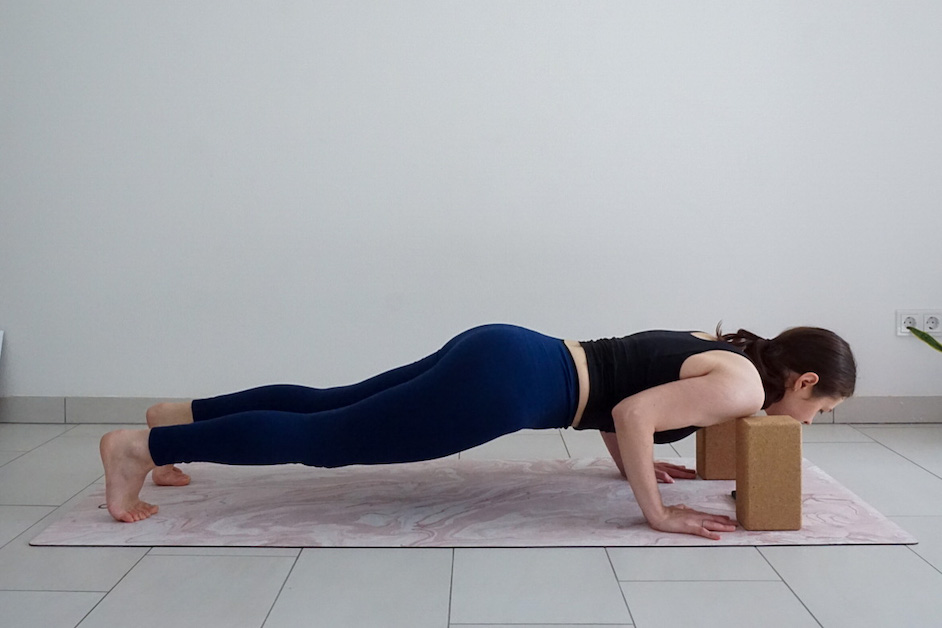
23. Chaturanga Dandasana
Performing Chaturanga requires a strong core and upper body. To help engage your core muscles and prevent your shoulders from dropping too low, place two blocks at the highest setting under your shoulders, directly in front of your hands. Start from a plank position, shift slightly forward, and lower halfway down while keeping your core engaged. Hold this position for as long as you can before pressing back up to plank. You can also practice this pose with your knees down first.
24. Hero Pose
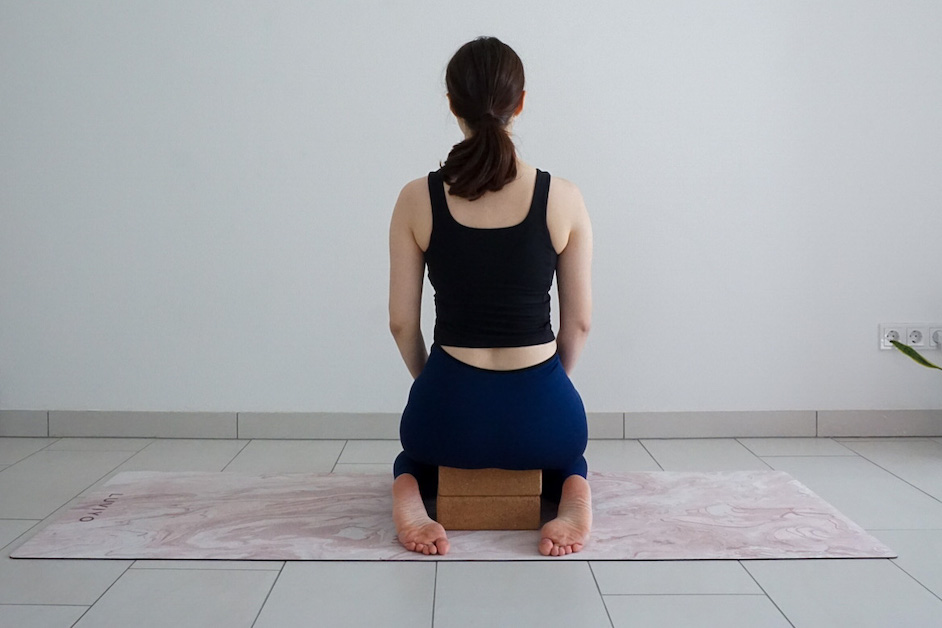
If you experience discomfort in your knees during Hero pose, try sitting a bit higher on one or two blocks.
25. Supported Shoulderstand
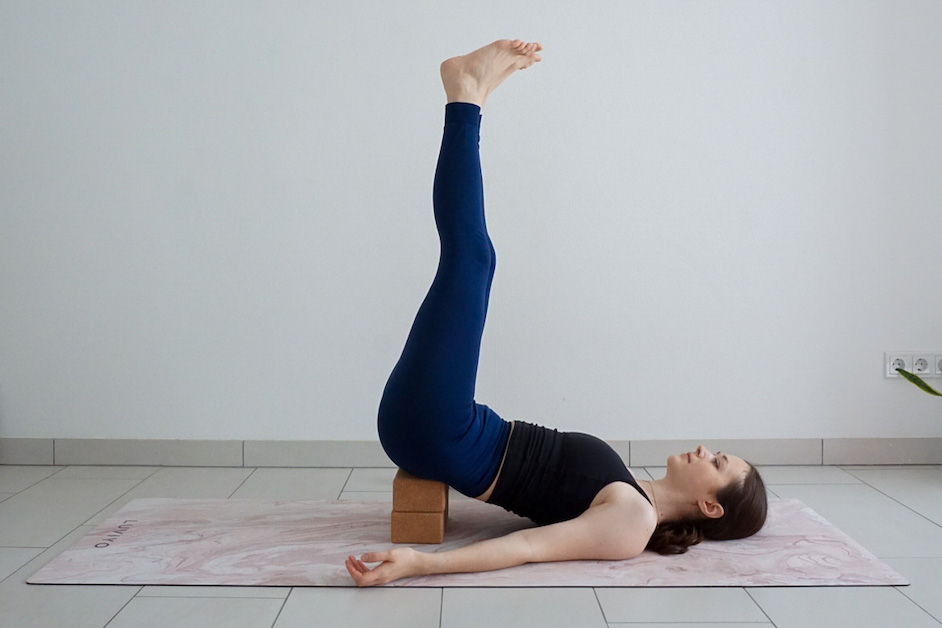
To support your sacrum in this pose, place a block or two directly underneath it. Experiment with different block heights to find what feels right for you.
26. Half Split
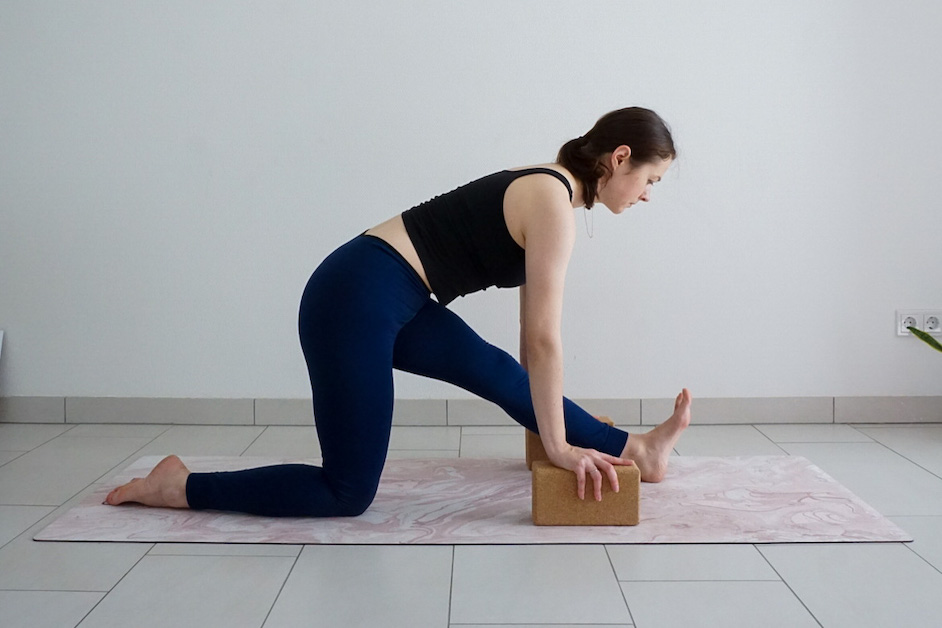
Place blocks under your hands on both sides of the extended leg for support and keep your spine long as you bend forward.
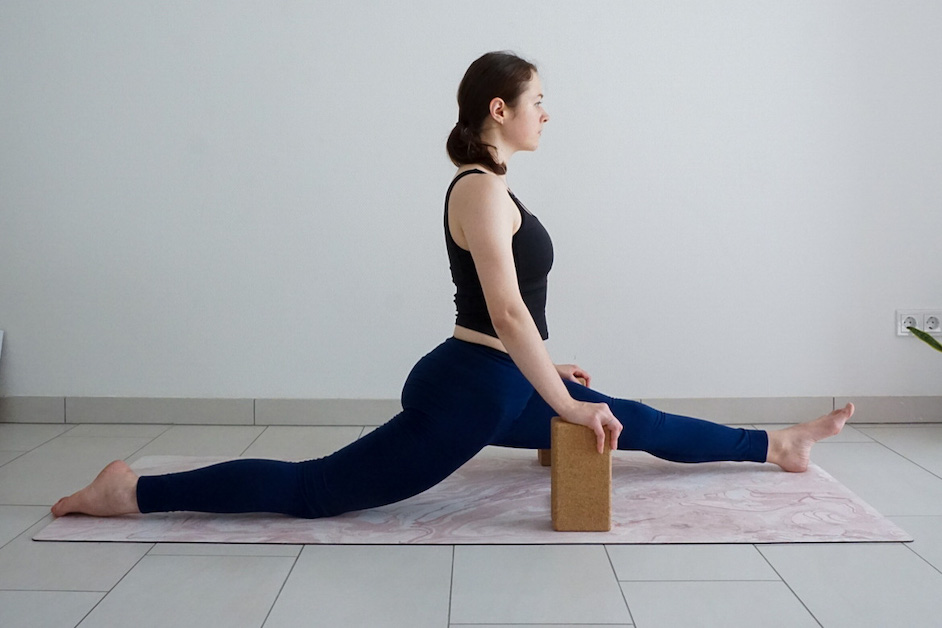
27. Front Split
Place your hands on blocks for added control as you lower into the full front split. As you progress with your split and get closer to the ground, place a block under the glute of your front leg for support and try removing hand support for strong leg engagement in this position.
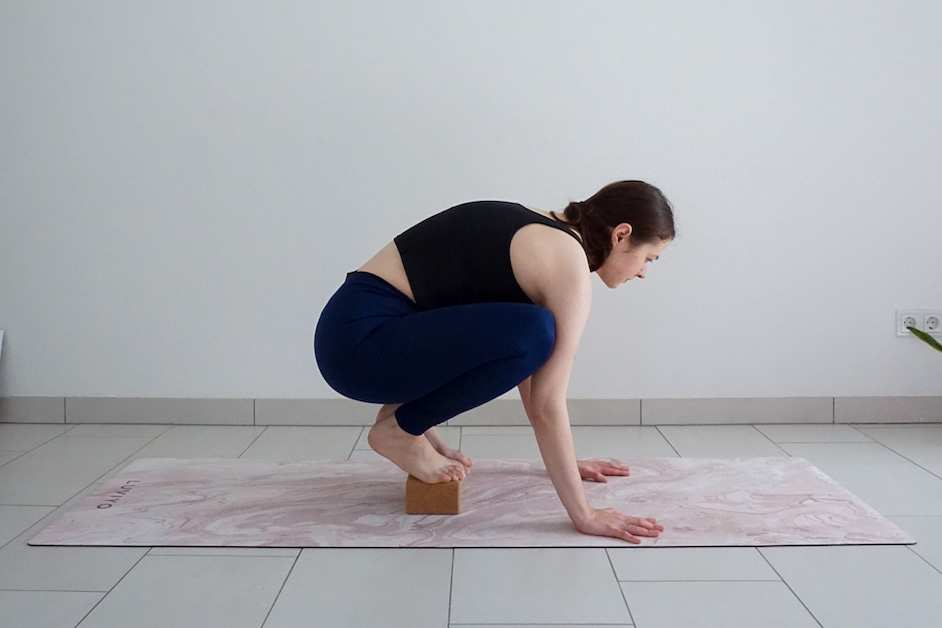
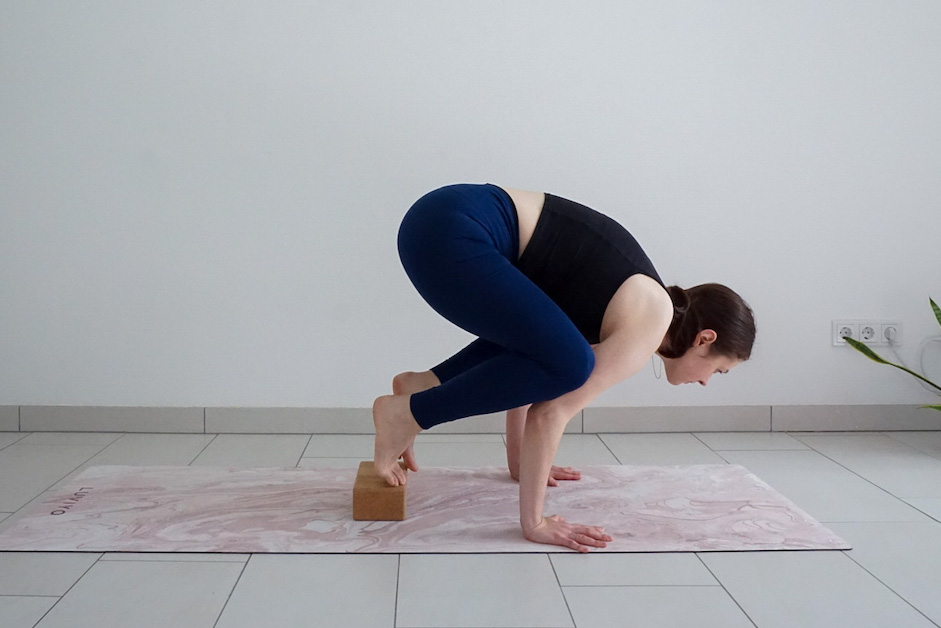
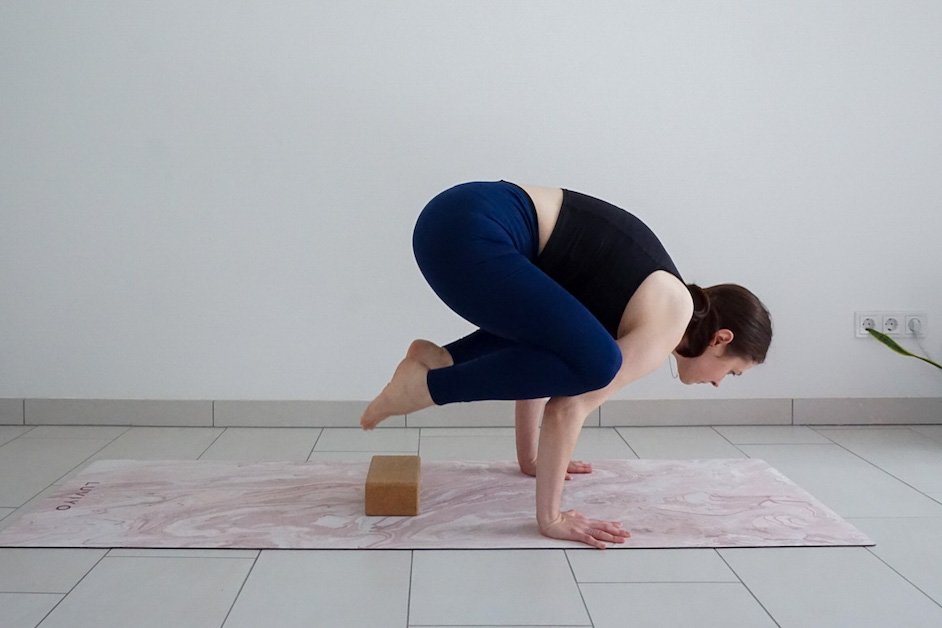
28. Crow Pose
By standing on a yoga block, you raise the height of the floor, making it easier to balance as you shift your weight forward into crow pose.
29. Seated Forward Fold
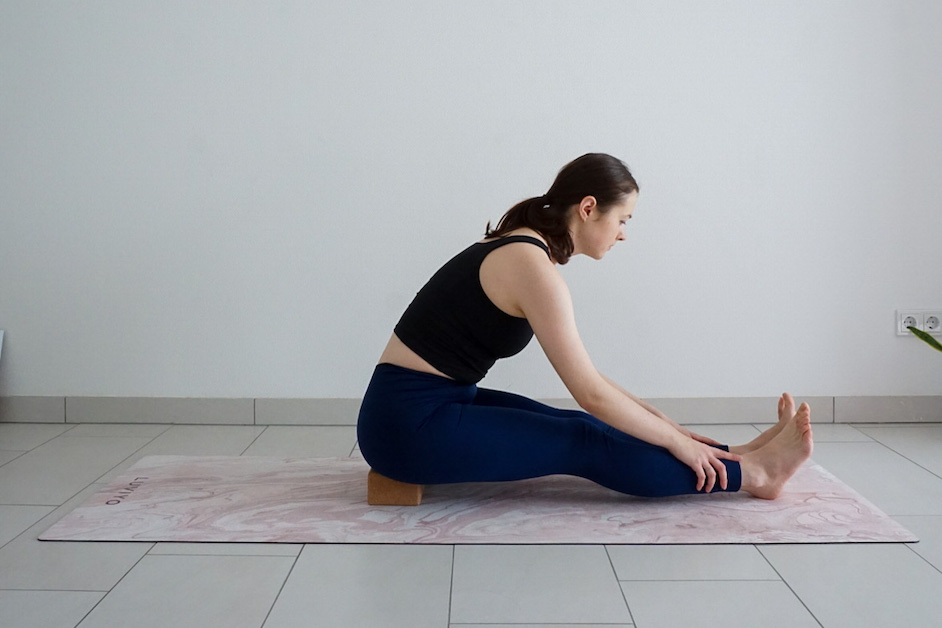
To elevate your hips, sit on the edge of a block. This tilts your pelvis slightly forward, making it easier to bend forward from your hips and keep your spine long.
30. Easy Pose

Sitting in Easy pose for a long period of time can be challenging, especially for those with tight hips. If you find that your knees are hovering high above the floor and it’s uncomfortable to sit cross-legged, try sitting on a block. This can help your hips relax and make it much easier for you to sit in this position for a longer period of time, such as during meditation or breathing exercises.
In conclusion, yoga blocks are a versatile and essential tool for any yoga practice. They offer support, stability and comfort in various poses, making them accessible for all levels of practitioners, from beginners to advanced. Whether you need to modify a pose to accommodate an injury, add intensity to your practice or simply find more comfort in a pose, using blocks can help you deepen your practice and improve your overall experience. By incorporating blocks into your yoga practice, you can create a safe and supportive environment that allows you to challenge yourself and grow in your practice. With so many different ways to use yoga blocks, there is no limit to the benefits you can gain from incorporating them into your yoga routine.
Pingback: 11 Ways To Use A Yoga Strap/Yoga Belt - Yoga with Uliana
Pingback: 10 Beest Ways To Use A Yoga Bolster (with pictures)
Pingback: 10 Ways To Use A Yoga Blanket - Yoga with Uliana
Pingback: 10 Yoga Poses For Tight Hips (Beginner Friendly) - Yoga with Uliana
Pingback: 12 Best Ways To Use Yoga Blocks (Not Only) For Beginners
Pingback: 10 min Yoga Stretch For Tight Hamstrings (Video + Printable PDF) – Yoga with Uliana
Pingback: 6 Warrior Pose Variations: Virabhadrasana For Beginners – Yoga with Uliana
Pingback: How To Use Yoga Blocks – Erickkasysavane