Yoga blocks are a versatile prop that can enhance your asana practice, making certain poses more accessible or helping you to deepen them. Unlike other props like straps and blankets, household items can’t easily substitute yoga blocks, so I advise beginners to invest in a pair when starting their practice. In this post, you’ll discover 12 ways to incorporate yoga blocks into different yoga poses. Give them a try and see if they can benefit your practice.
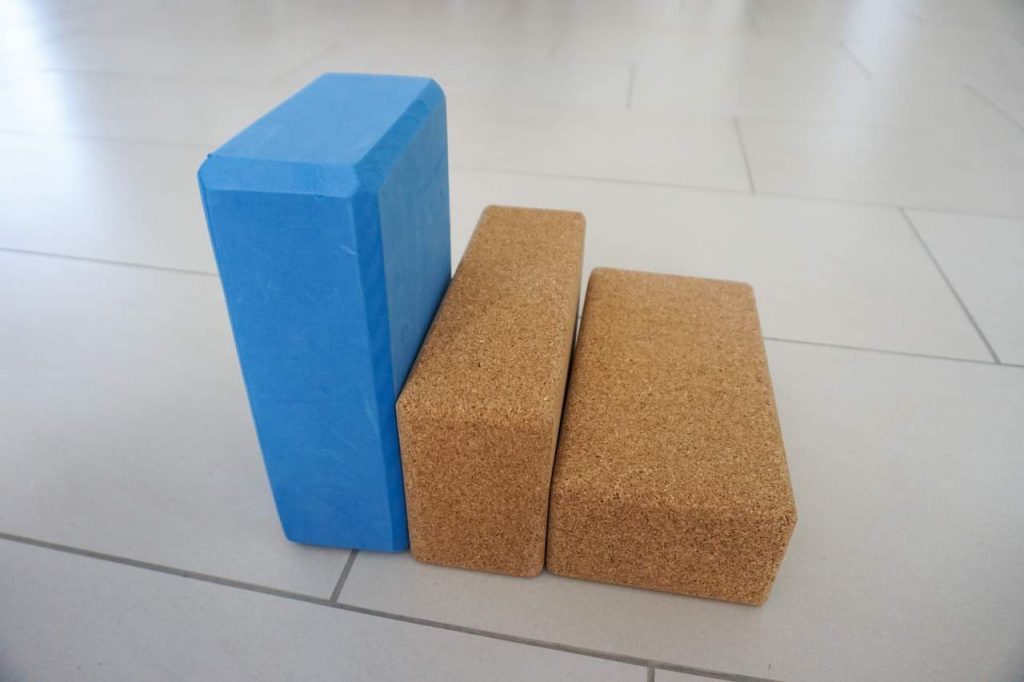
Yoga blocks come in different materials, including foam, cork, and wood. Foam blocks are lightweight and soft, making them easy to carry to the studio or gym. They’re comfortable for restorative postures and for supporting sensitive parts of the body. However, they may not provide enough stability in poses where weight must be leaned on the blocks. Cork blocks are heavier than foam and provide more stability in standing poses. They’re eco-friendly and last longer, making them a great choice for beginners. Wooden blocks are rare nowadays, they are heavy and can become slippery when sweating, so they are not recommended for beginners. Bamboo blocks can be an alternative option.
Beginners can choose between foam and cork based on their personal preference. Buying a pack of two blocks is also recommended, as they can be used in symmetrical poses. The most common and versatile size is 22 x 12 x 7.5 cm, and they can be used in three settings: lowest, middle, and tallest.
Here is how you can use yoga blocks in your practice:
1. Easy Seated Pose
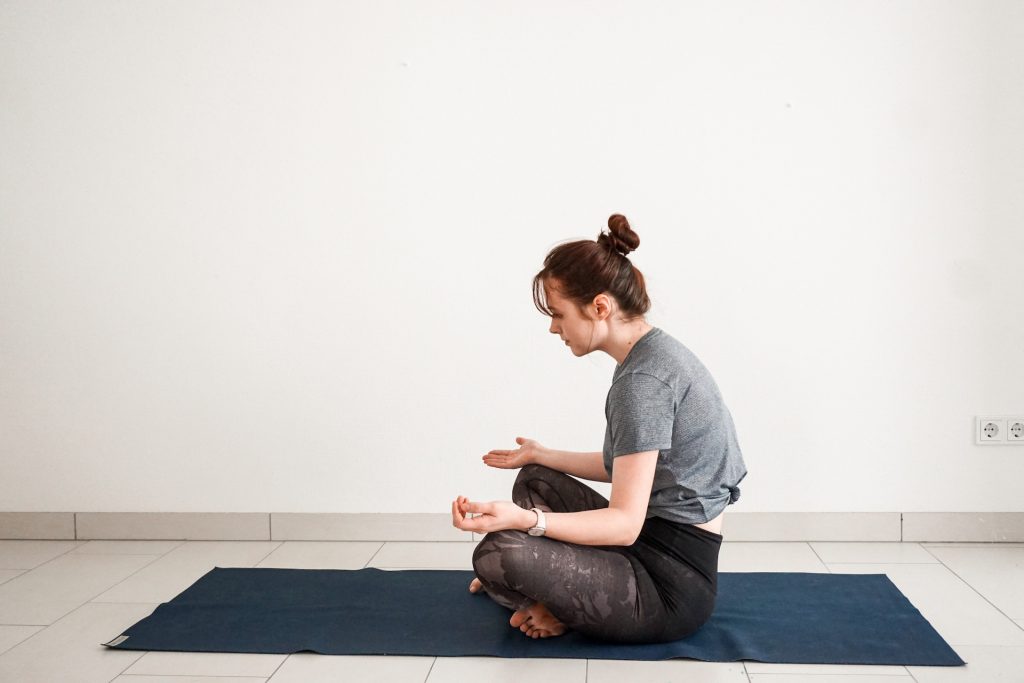
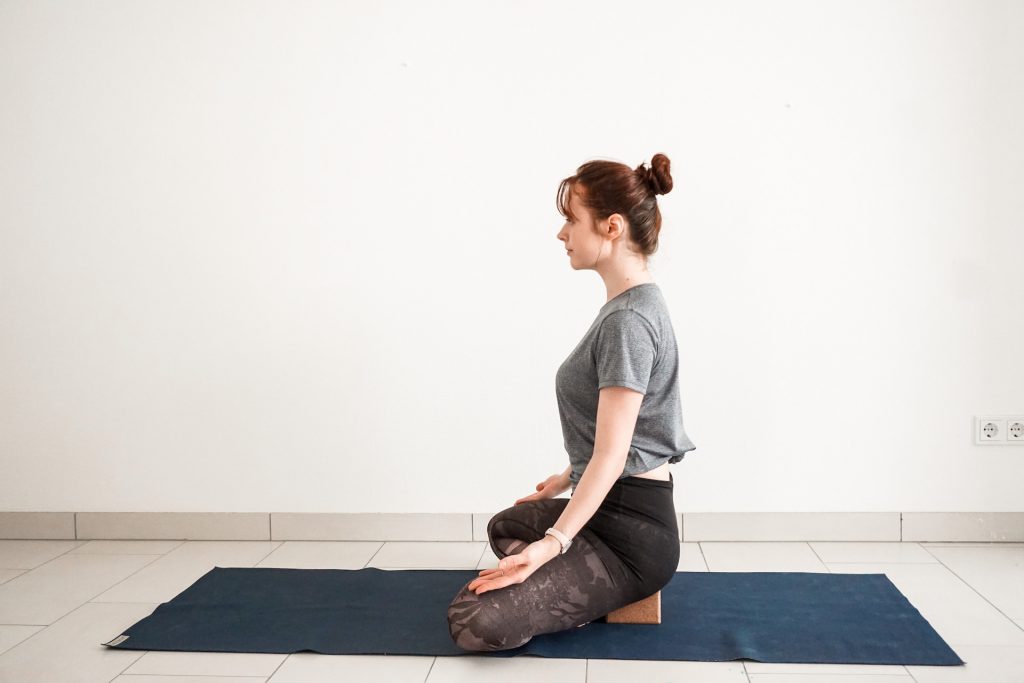
Sitting on the floor with crossed legs and a straight spine can be challenging for many people, especially at the start of a yoga class when the body is not yet warmed up. To make it easier, try placing a yoga block on the lowest setting and sit on the edge of the block, letting your knees lower to the floor. Keep the spine straight and extend the crown of the head towards the ceiling. This modification will help you sit comfortably for a longer period, such as during meditation or pranayama. If a yoga block is not available, you can use a blanket to raise your hips.
2. Seated Forward Fold
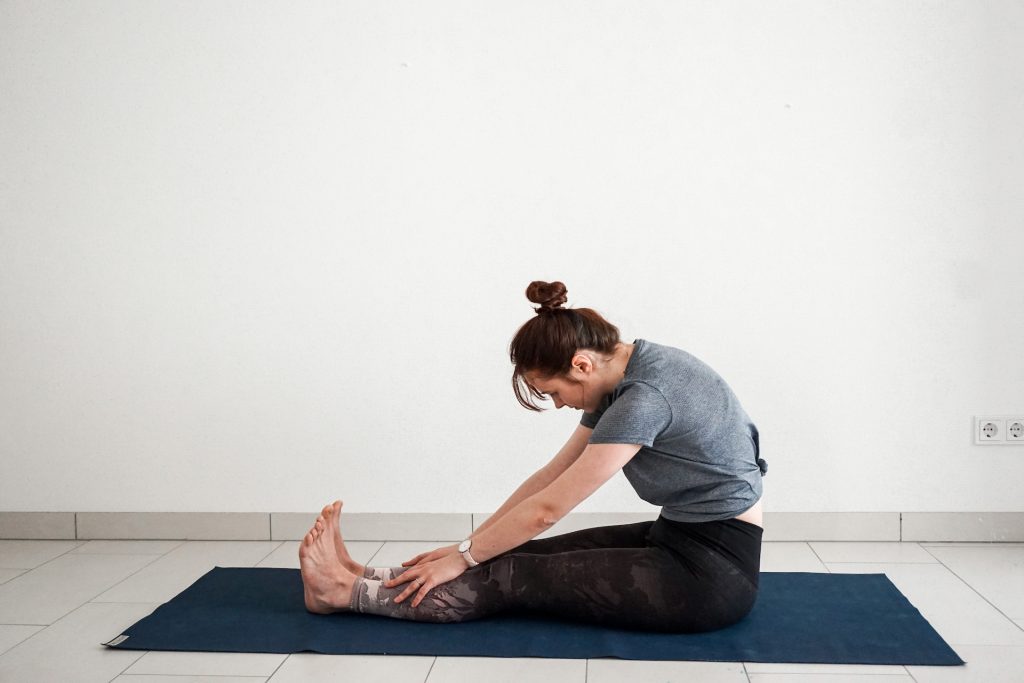
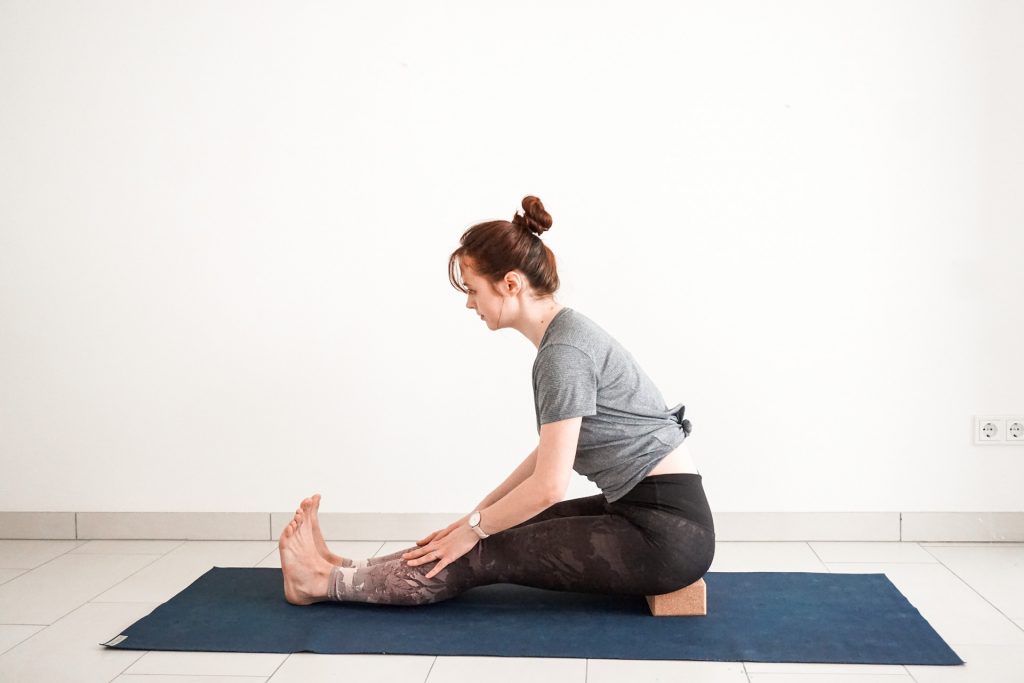
Collapsing the spine and rounding the chest and shoulders is a common mistake in seated forward fold. Bending forward this way might allow you to reach your toes, but it won’t stretch your hamstrings effectively. To avoid this, try sitting on the edge of a yoga block as described in the previous modification. This will help you tilt your pelvis forward while folding forward and bend more from the hips, not just from the spine. Keep the spine long, avoid rounding the lower back, and fold forward as much as you can. This pose can also be performed using a blanket instead of a yoga block.
3. Extended Side Angle
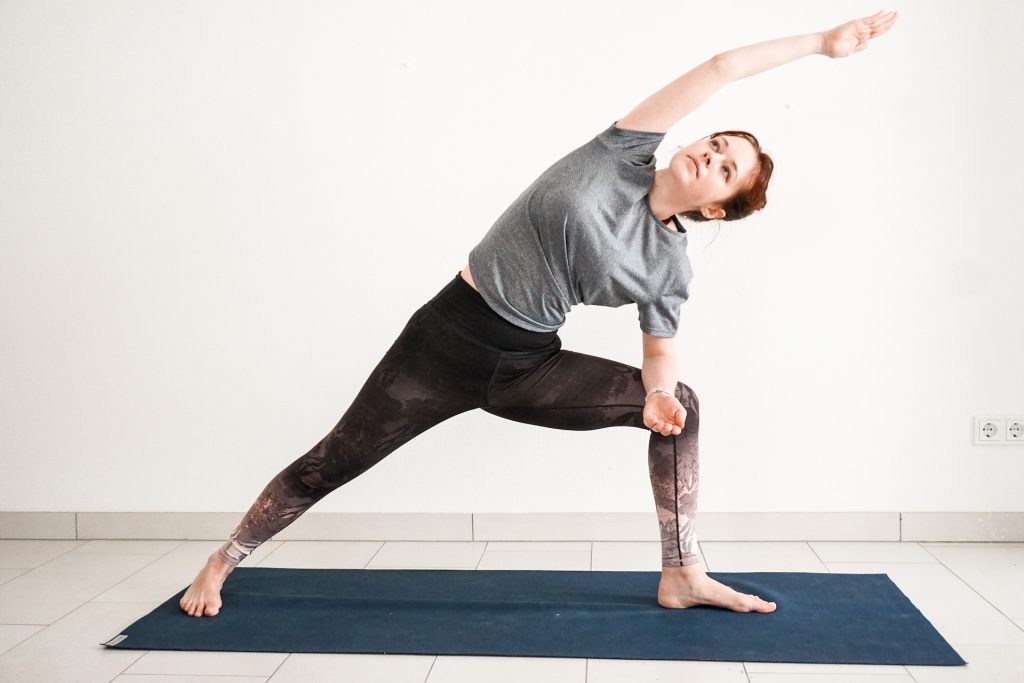
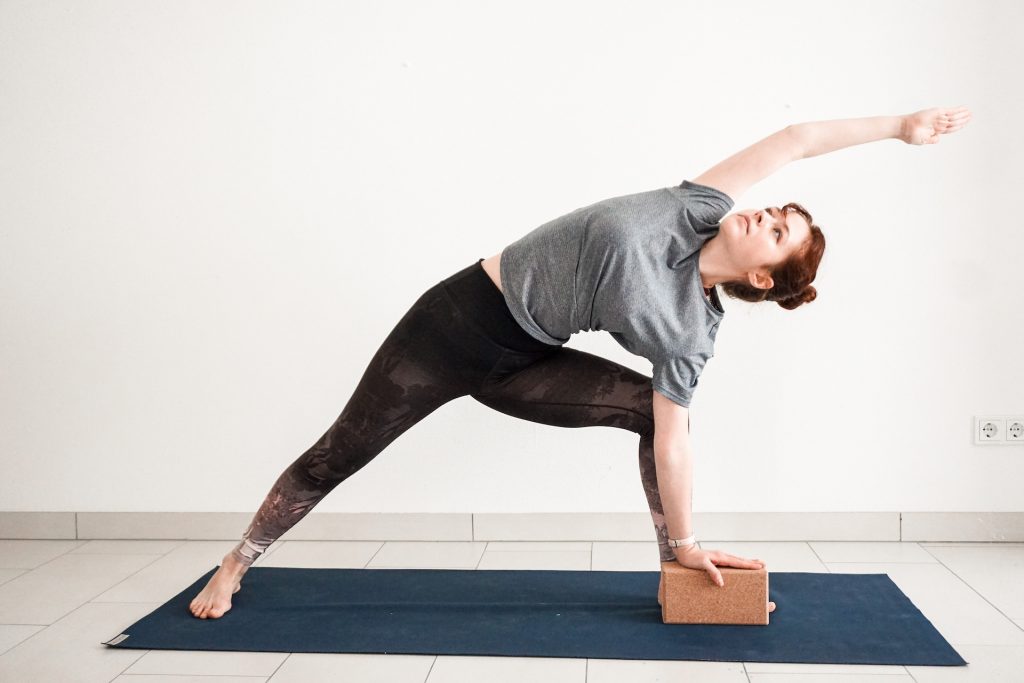
For side angle pose, place your forearm on your thigh and extend the other arm above your head. To go deeper, place your hand on a yoga block if your fingertips do not reach the floor. You can start with the block at its highest setting and gradually lower it as you progress.
4. Revolved Side Angle
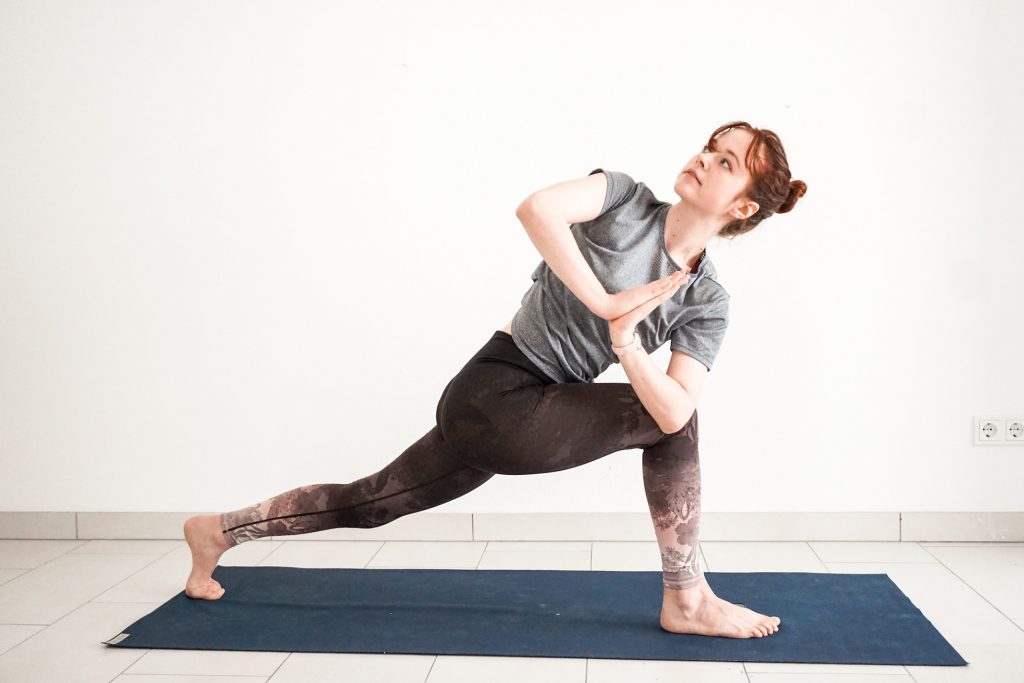
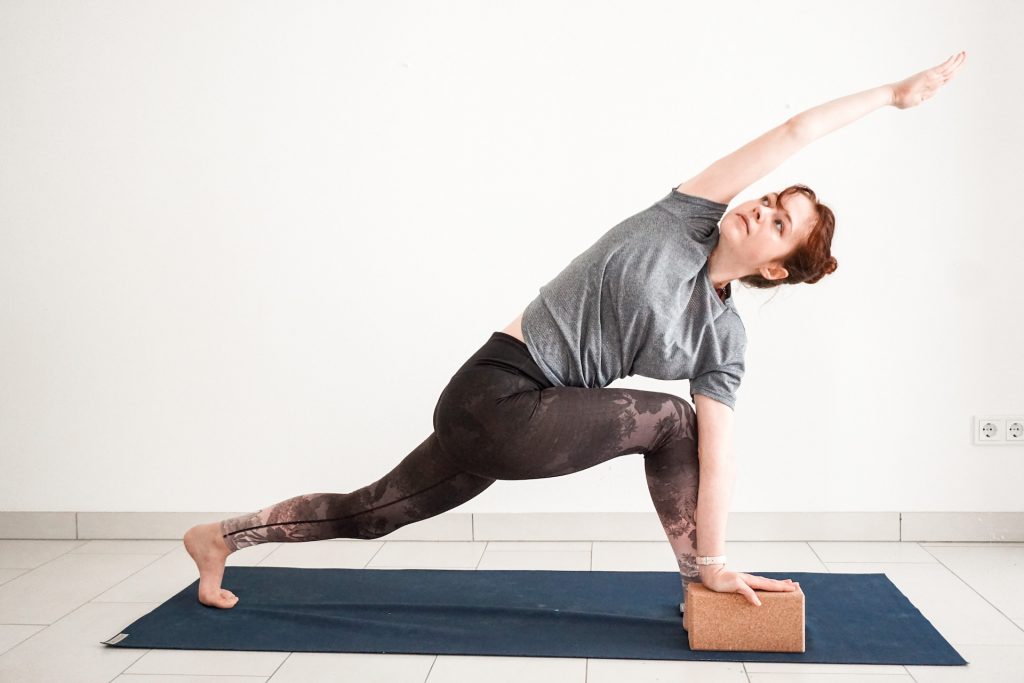
In a similar manner, you can use a yoga block outside your front foot to support yourself if your fingertips do not reach the floor.
5. Triangle Pose
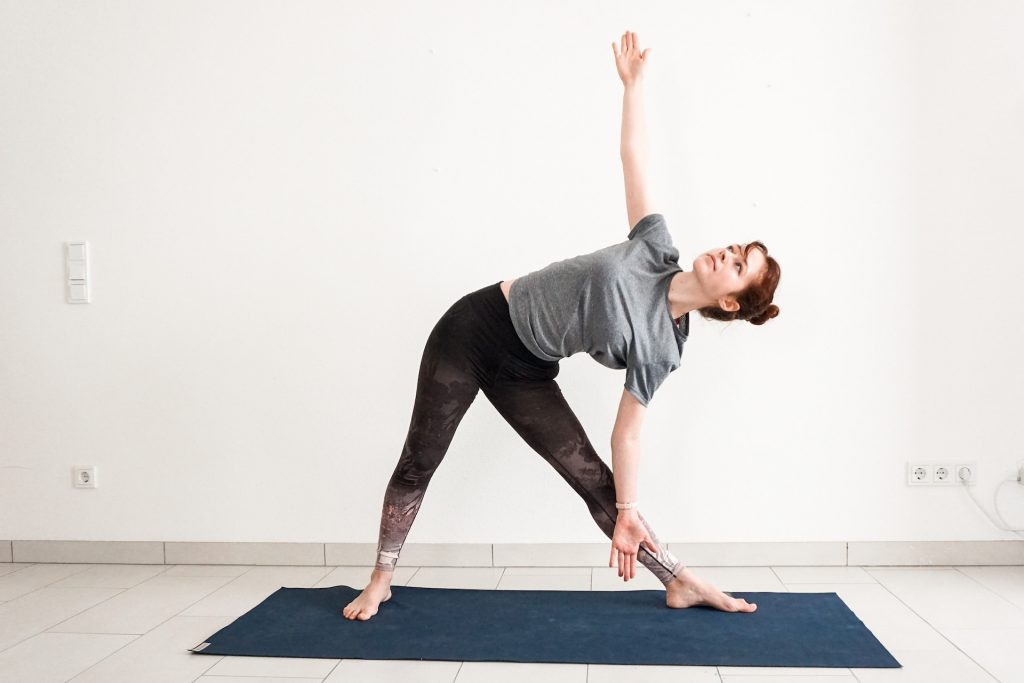
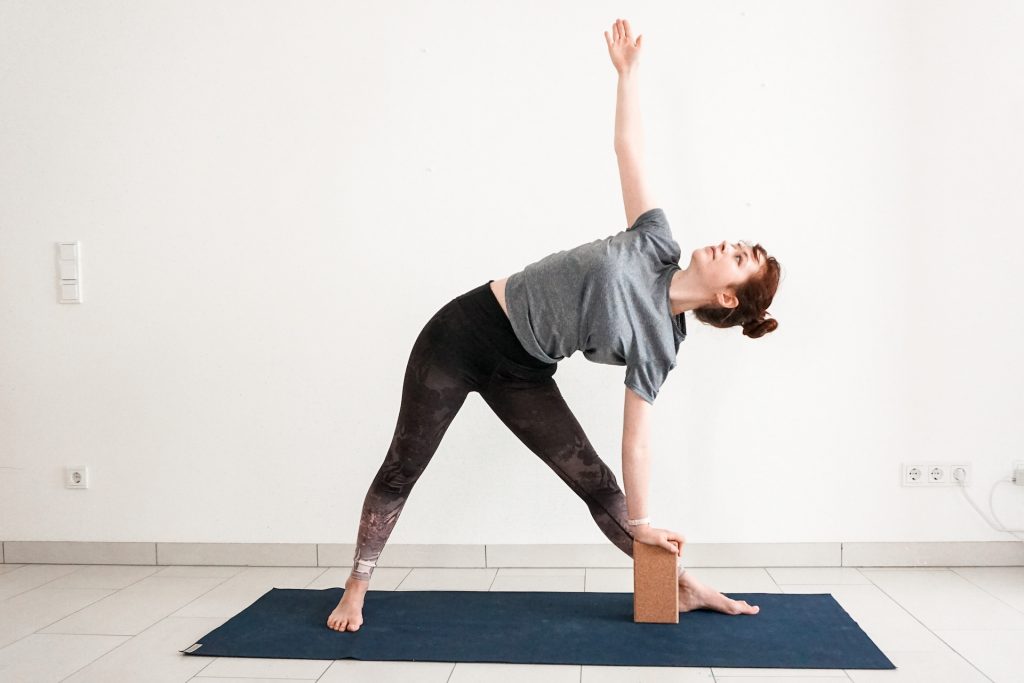
In triangle pose, it’s common to overextend the front knee and try to grab the big toe or place the hand on the mat. However, reaching your toes is not necessary to get a good stretch. Use a yoga block on the inside or outside of your front leg for support and start with the highest setting. If you’re new to yoga, start with a bent front knee, place one hand on the block, and lift the other arm towards the sky. Gradually straighten the front leg to feel a stretch in your hamstrings.
6. Revolved Triangle
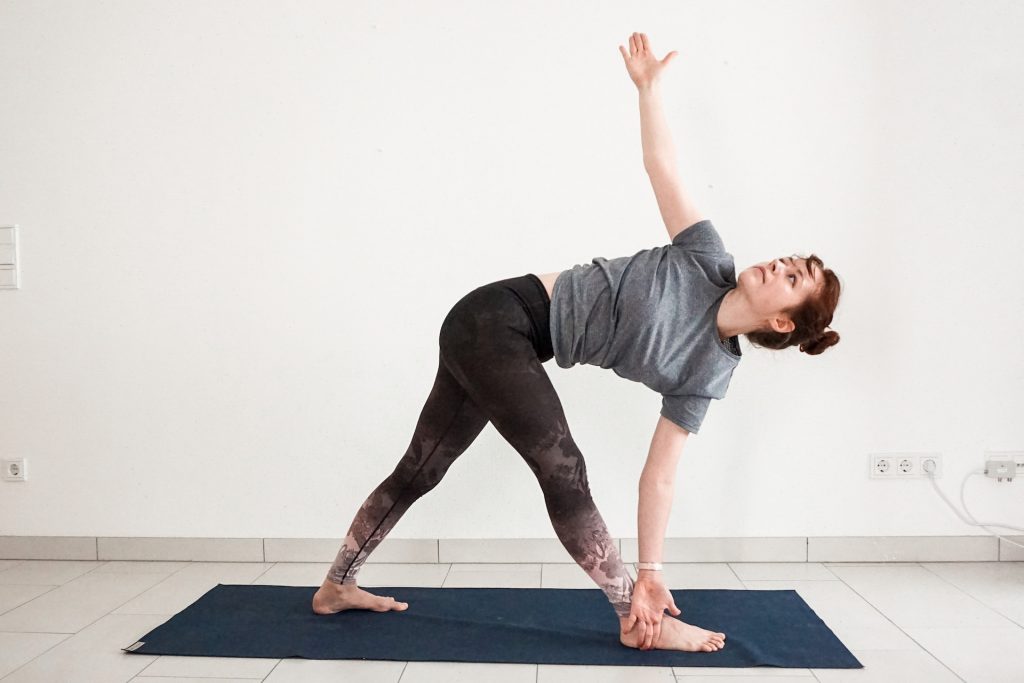
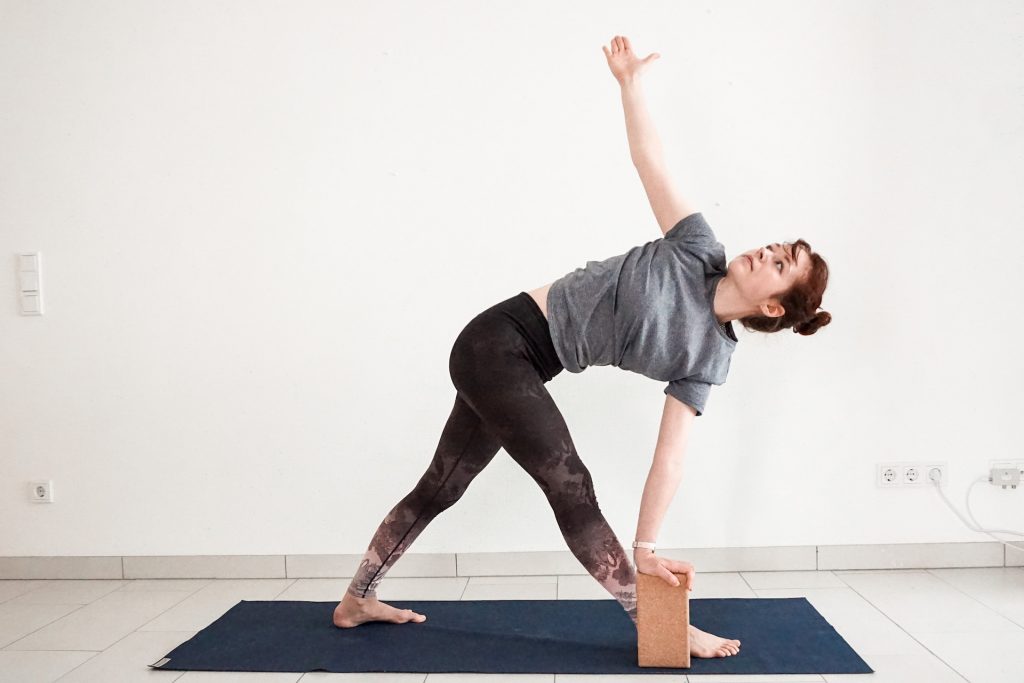
The traditional alignment for revolved triangle pose is heel to heel, but if you have trouble maintaining stability and keeping your hips facing forward, try placing your feet wider as if standing on two rails. Lengthen the spine with an inhale, hinge from the hips with an exhale, and bring your upper body parallel to the floor. If your hand does not reach the floor, use a yoga block on the outside of your front foot.
7. Half Moon Pose
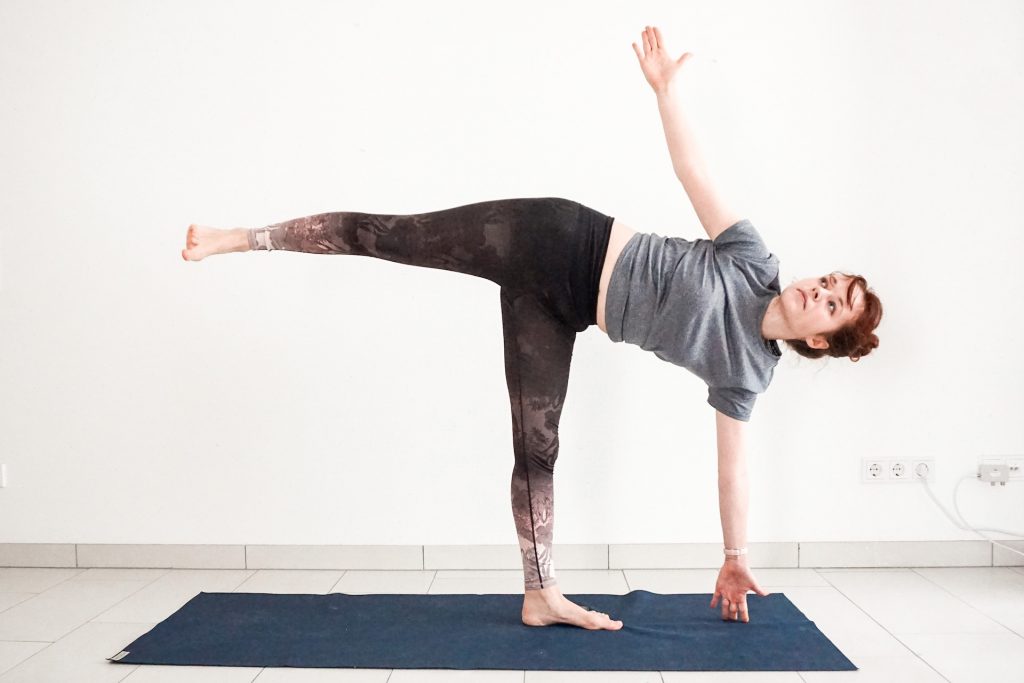
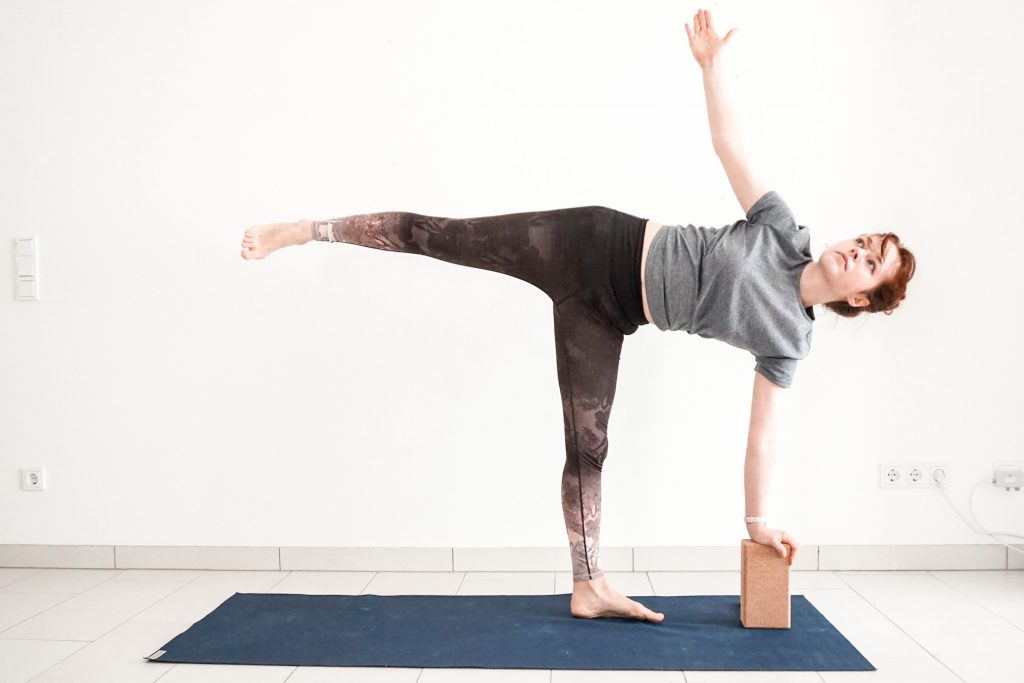
You can use the block to balance in half moon pose. From triangle pose, place the block in line with your front foot, press you hand down into the block and shift your weight to the front leg. Slowly raise the back leg. Your top hand can stay on the hip or straighten the arm up to the sky.
8. Bridge pose
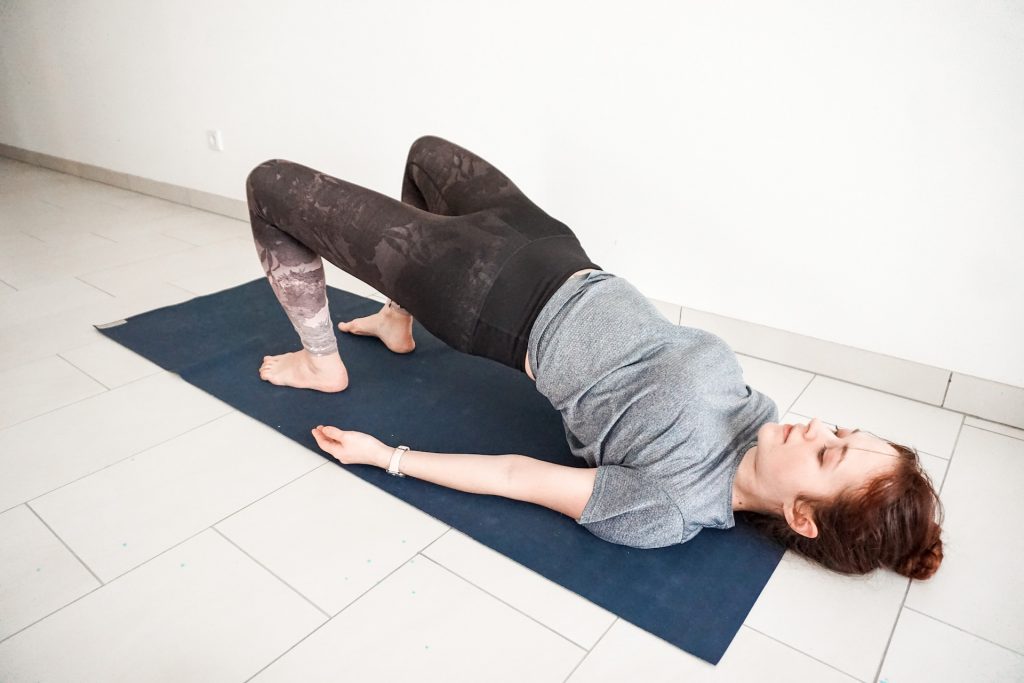
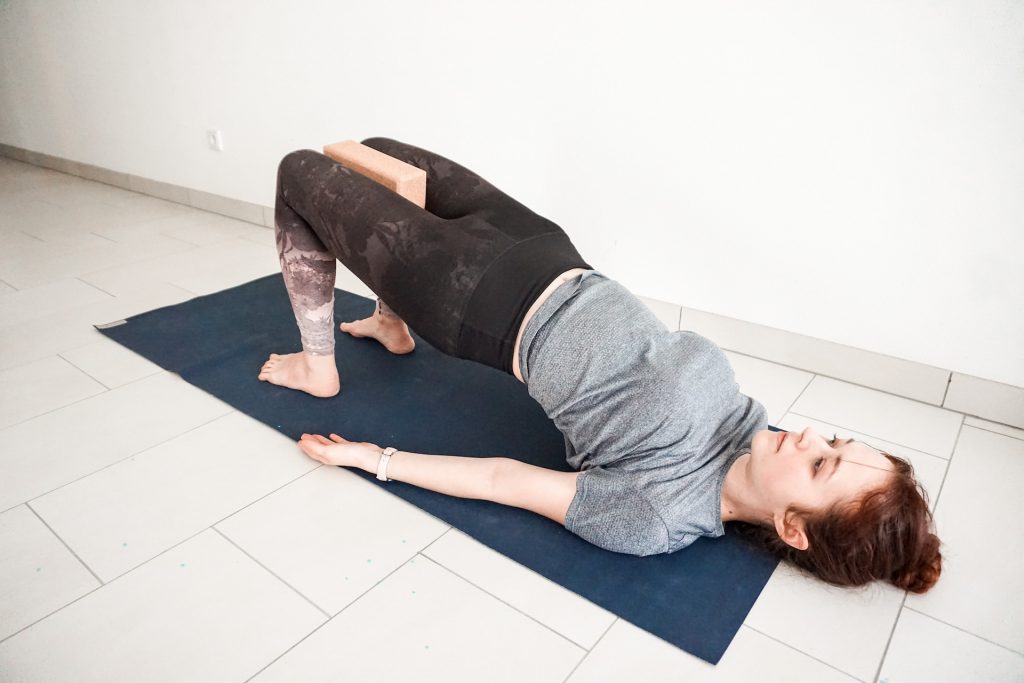
To perform bridge pose correctly, inner thighs need to stay firm and active. To maintain proper alignment, place a yoga block with its narrowest width between your inner thighs. Squeeze the block lightly, then raise your hips while pressing the block. This modification will help you learn proper alignment and relieve pressure on your lower back.
9. Supported bridge pose
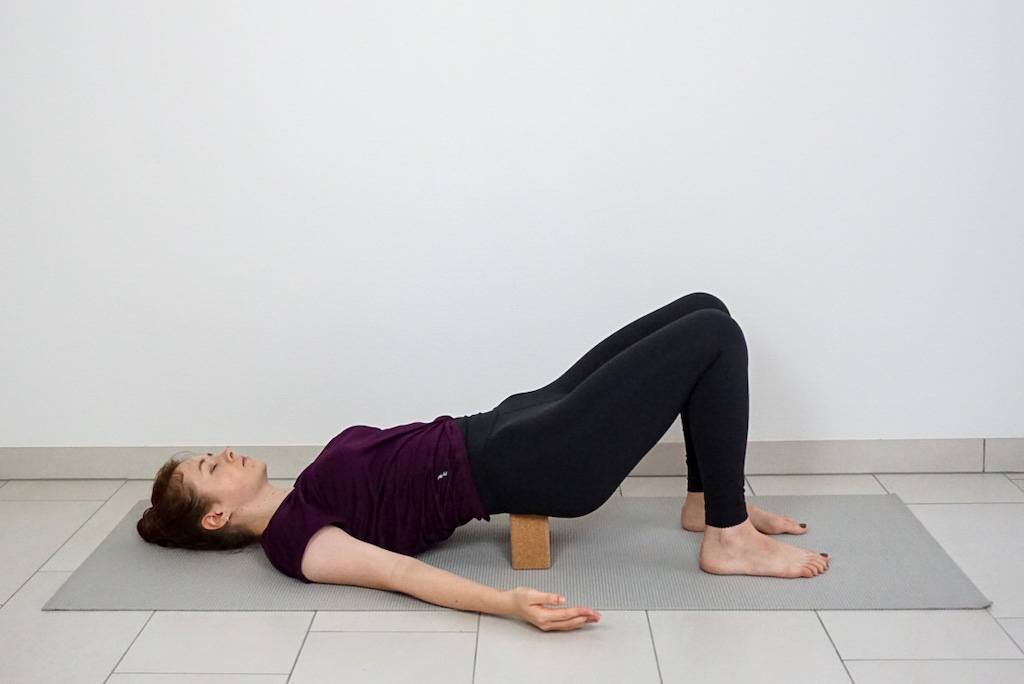
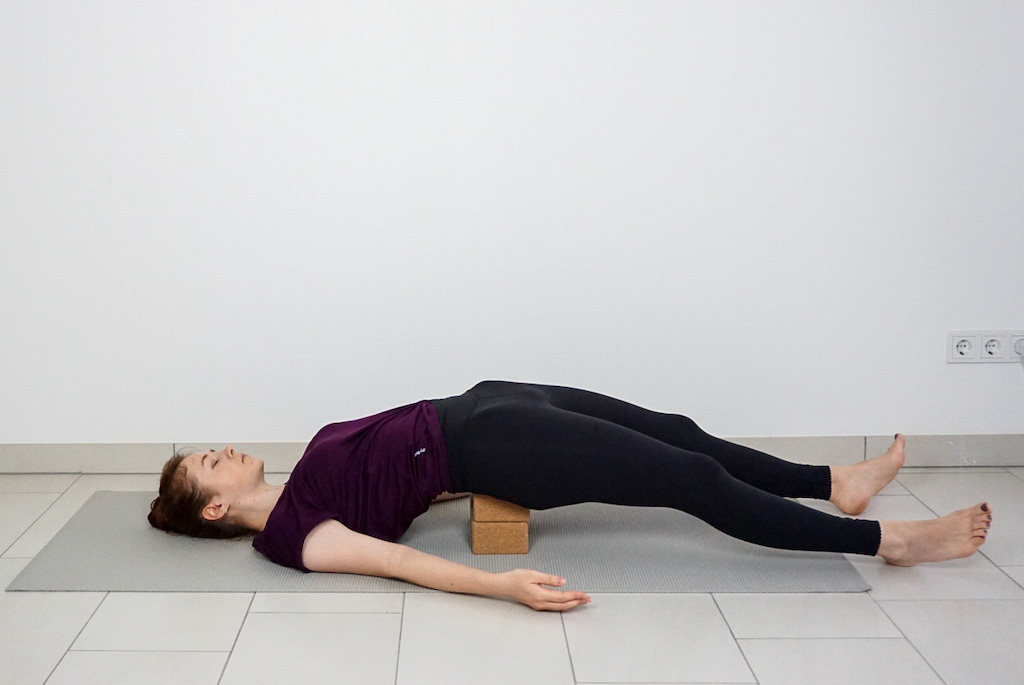
Supported bridge pose is a great restorative yoga pose. Place the block under your sacrum, not your lower back, start with the lowest setting and then adjust higher if you need to. Your knees can stay bent, just like in simple bridge pose, or you can try straightening the legs one by one to increase stretch on your hip flexors.
10. Supported Fish Pose
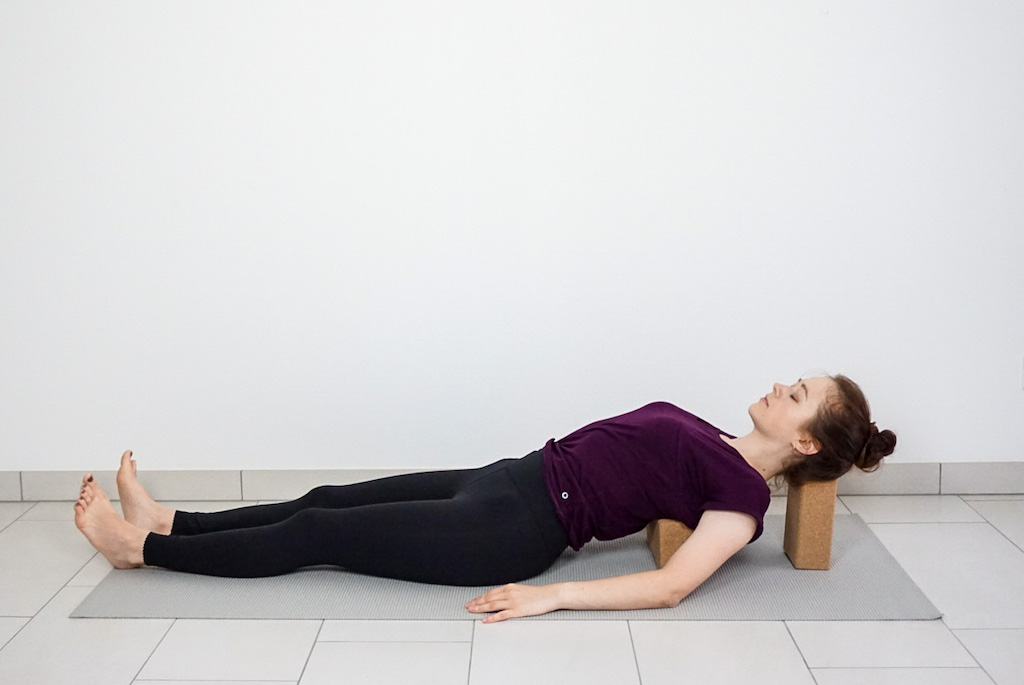
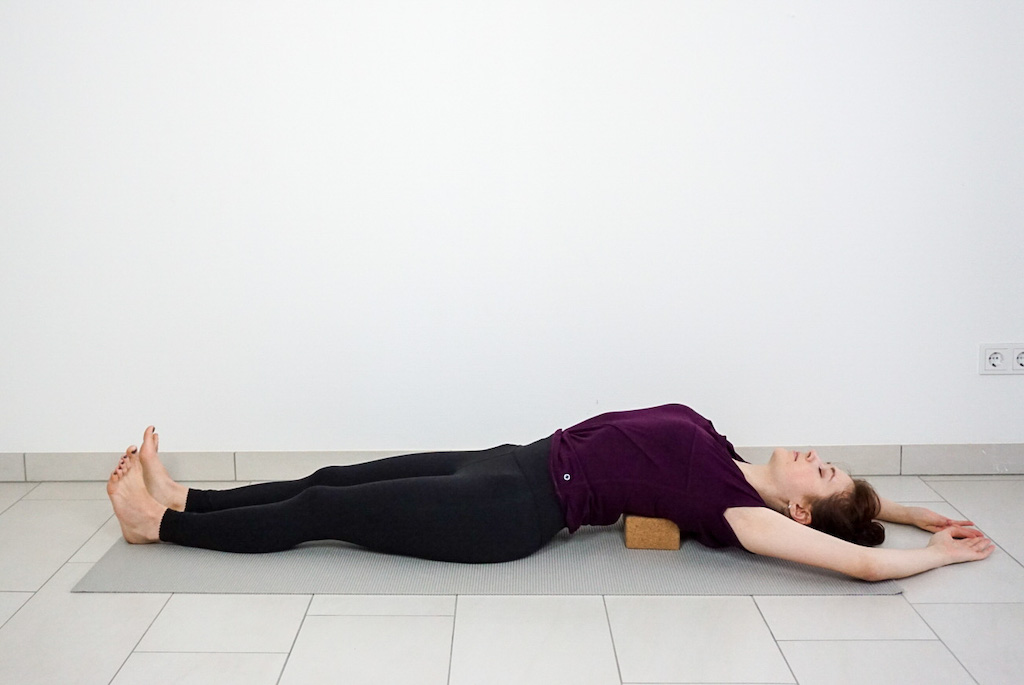
For a gentle chest opener, lay on your back with a block under your shoulder blades. If comfortable, let your head rest on the mat, otherwise use another block or pillow to support you head and neck. To increase intensity, use a higher block or place the block with its narrow side between your shoulders.
11. Legs “Up The Wall” Pose In The Middle Of The Room
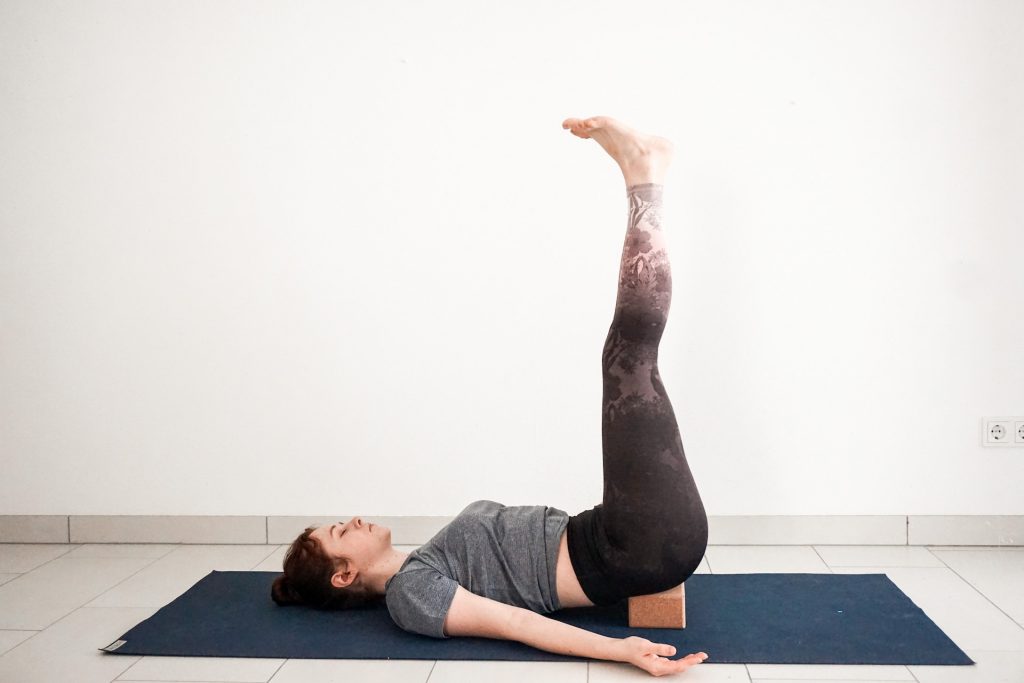
Shoulderstand can be a great restorative pose at the end of a yoga class, but if it’s not accessible, try Viparita Karani (legs up the wall) instead. Place the block under your sacrum, just as in supported bridge pose, and extend your legs towards the ceiling. Relax for a few minutes.
12. Reclining Bound Angle Pose
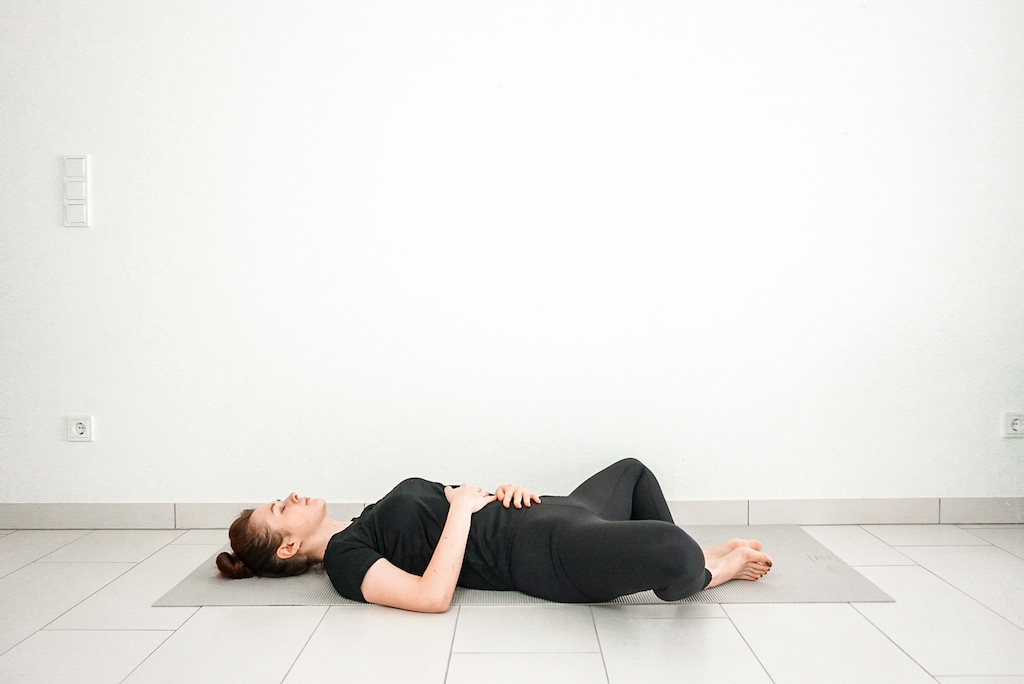
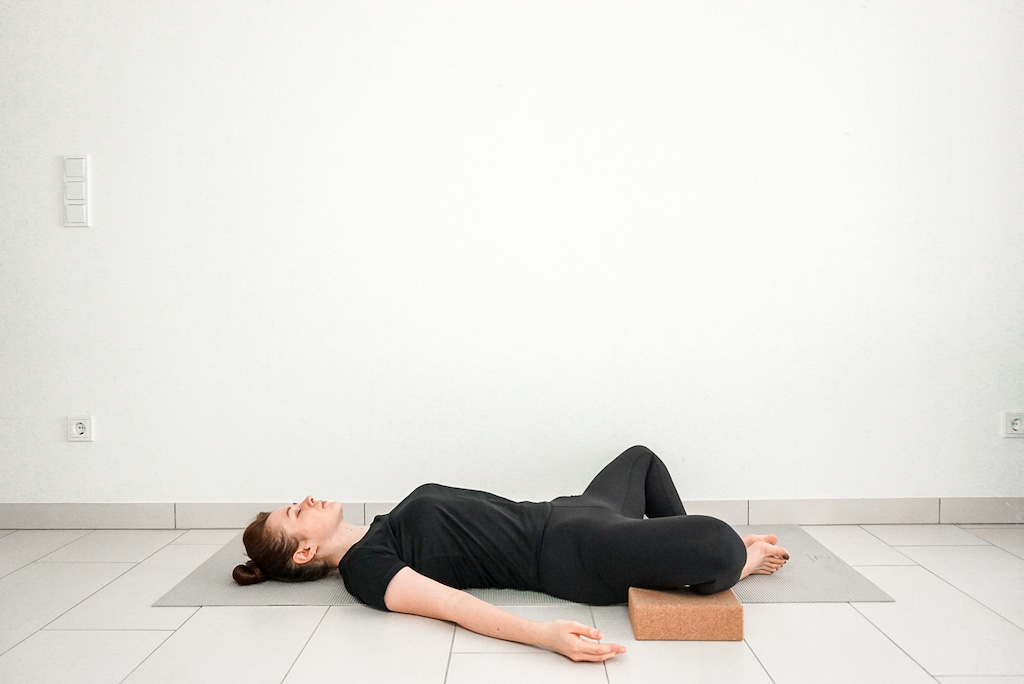
Lie on your back with arms at your sides and feet together. Allow your knees to open and lower towards the floor, using two yoga blocks to support your thighs. The blocks will relieve pressure on your inner thighs, allowing for deeper relaxation and and release in the hips.
In conclusion, using yoga blocks during your practice can enhance your yoga experience by providing support and stability, allowing for proper alignment, and reducing the risk of injury. Additionally, blocks can also help deepen stretches, increase flexibility and make challenging poses more accessible. With the variety of ways to use yoga blocks, they are a valuable tool for both beginners and experienced yogis to improve their practice and experience the full benefits of each pose.
Thank you, your video is very helpful. I am in my early 60’s and my yoga instructor suggested trying yoga blocks. I have balance issues after surgeries on both feet. I feel much more comfortable using the blocks after viewing your step by step video.
Pingback: How Do You Sit On A Yoga Block? – Erickkasysavane
Pingback: Are Yoga Blocks Toxic? – Erickkasysavane